If you are looking to plan a trip to Sedona, it’s likely you’ve heard about Soldier’s Pass Trail – and for a good reason. If you start at the trailhead, it’s a moderately short hike, the trail is easy to navigate, and there are scenic stops along the way. Oh – and there’s a hidden cave off the beaten path. Casual, right?
This post may contain affiliate links that I earn a small commission from at no cost to you. When you purchase through my affiliate links, it helps me to continue doing what I love, which is helping you learn the best things about the places I travel!
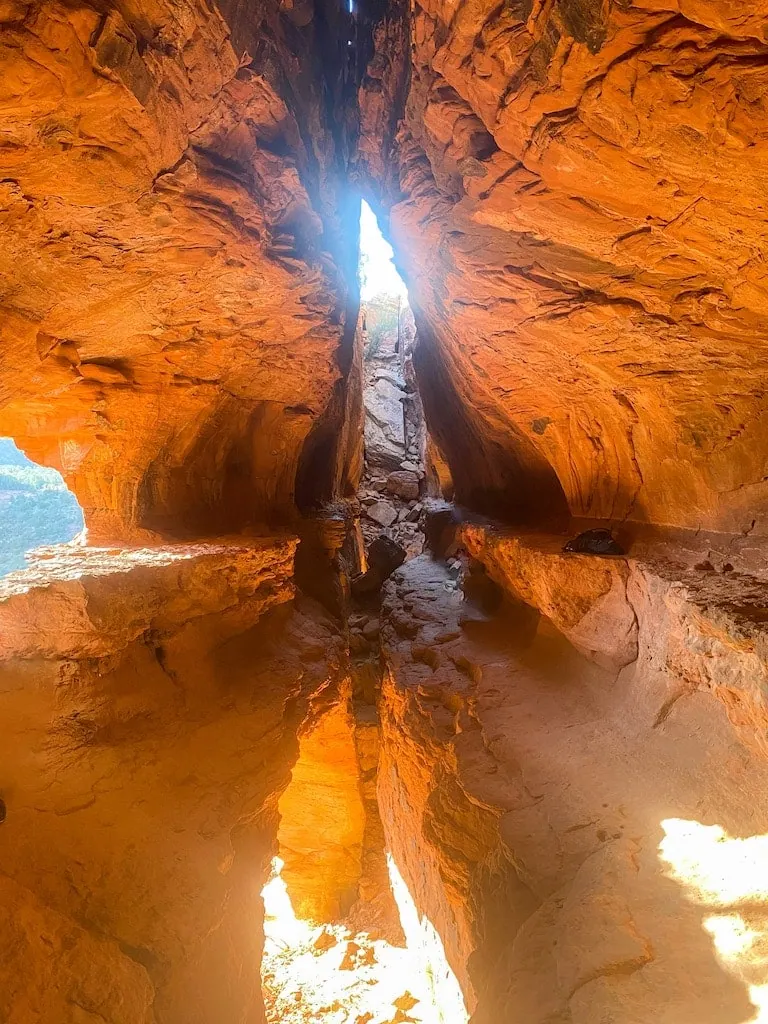
Hiking in Sedona is second to none because of the gorgeous landscape, the variety of trail options, and the hikes with hidden surprises. Thanks to the Internet, the hidden Soldier’s Pass spur cave has grown in popularity largely because it’s so uniquely picturesque. While the hidden cave on the Boynton Canyon trail resembles a subway, this one is a little harder to describe. If I’m standing inside of the cave at the far end, it almost reminds me of a time machine. Except, you know…time machine but make it nature.
Ready for me to share all my secrets for how to get here? This blog post covers where to park, the best maps to hike the trail, and of course, how to get to the spur cave. Keep reading to discover the best way to find the hidden cave on Soldier’s Pass Trail.
HIKING ETIQUETTE: LEAVE NO TRACE
Sedona’s beauty is hard to match, and that is largely due to proper hiking etiquette and following the Leave No Trace principles implemented by the city. These guidelines help to keep nature and the outdoors in the most preserved, pristine conditions possible. Before hiking and/or visiting, check out 7 of Sedona’s Leave No Trace principles here.
How to Get to Soldier’s Pass Trail
You have a couple options for how to get to Soldier’s Pass. Some trailheads require a Red Rocks Pass to park there, but most trails that do will have a kiosk where you can buy a pass on-site if you don’t already have one.
- Pro Tip: There are NO bathrooms at Soldier’s Pass Trailhead parking lot. There ARE bathrooms at Jim Thompson Trailhead parking lot.
Parking at the Soldier’s Pass Trailhead
The main parking lot at the Soldier’s Pass Trailhead has a whopping 14 parking spots. In other words, if you don’t either get there at the crack of dawn or get REALLY lucky throughout the day, I suggest you have a Plan B as far as parking.
If you don’t get a spot at the trailhead, I would recommend taking the Sedona Shuttle (Thursday – Sunday), or parking at the Jim Thompson Trailhead if you’re okay with a longer hike.
Taking the Sedona Shuttle
Sedona has a shuttle that usually runs from Thursday through Sunday. However, when I was there, they were running a shuttle to and from the Soldier’s Pass Trailhead when they realized the lot was full. I do not know if they do this all the time (although it would be REALLY helpful).
You can visit the Sedona Shuttle website here to know which trails the shuttle services, where the pick-up spots are, and even view the real-time Sedona shuttle tracker to know exactly when your ride is arriving.
Parking at the Jim Thompson Trailhead
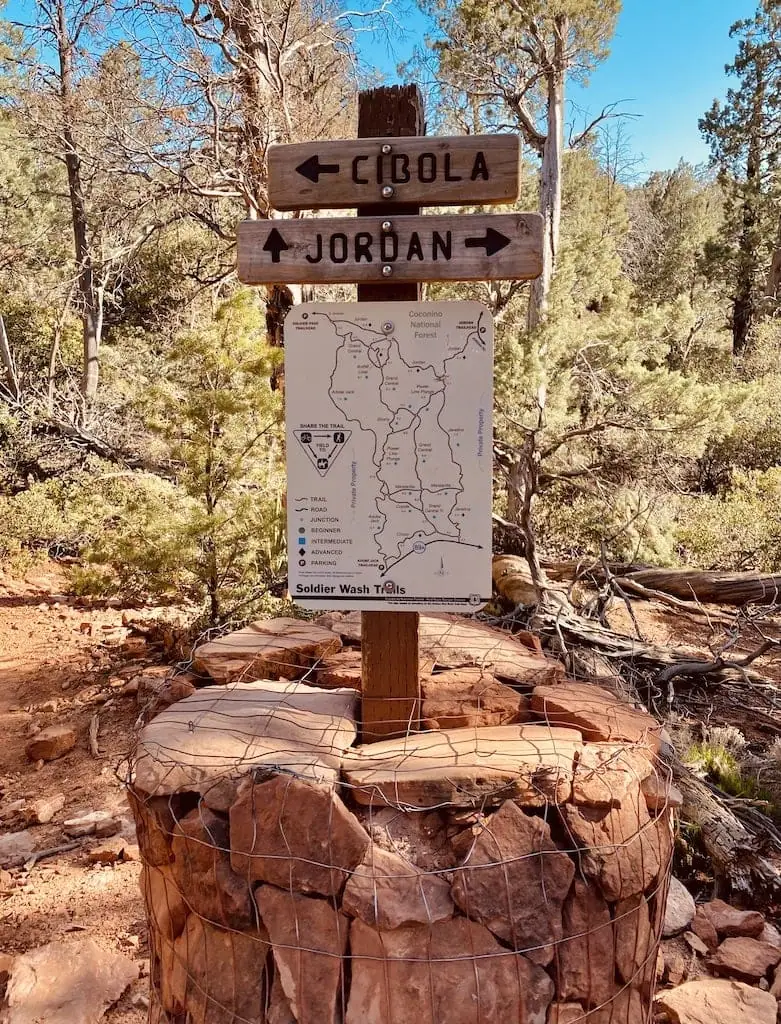
An alternative route to getting to Soldier’s Pass Trail is to arrive via Cibola Pass/Jordan Trail. The trailhead to Cibola Pass/Jordan Trail is known as the Jim Thompson Trailhead.
The Cibola Pass Trail leads you to the Jordan Trail which will lead you to the Soldier’s Pass Trail. This parking lot is much larger than the one at Soldier’s Pass, so many people choose to park here. When I hiked Soldier’s Pass, this is where I parked.
Important Things to Know About Jim Thompson Trailhead Parking
- The parking lot is BUMPY -> There are potholes that will eat you alive. Seriously. If your car sits low to the ground, you may want to re-think this strategy.
- This will significantly lengthen the time of your hike -> 6.4 miles vs. 4.8 miles if you start at Soldier’s Pass Trailhead.
- Cibola Pass/Jordan Trail is not very well marked -> Unlike a lot of the other hikes throughout Sedona, I did not see a lot of signs or cairns that helped mark your path and keep you on your trail. When doing this part of the hike, I relied heavily on AllTrails.
Finding the Right AllTrails Map for Your Soldier’s Pass Hike
If you are doing anything that involves hiking, AllTrails is a must. This app has saved me more times than I would like to admit. I can’t take direction at baseline (if you’ve followed this blog for awhile, you’re probably wondering how I made it through Europe on my own, and honestly, same) – so if you’re in the same boat, make sure you have this app downloaded before your hike.
Thanks to the increased popularity of this cave, AllTrails now has a trail route specifically to find it! If you are starting from the Soldier’s Pass Trailhead, I have seen this route called “Soldier’s Pass Cave Spur Trail” and also “Seven Sacred Pools and Soldier’s Pass Cave Trail.”
If you start at the Jim Thompson Trailhead, your route will be longer because you will begin your hike from Cibola Pass/Jordan Trail to eventually reach Soldier’s Pass Trail. I found that the easiest way to navigate to Soldier’s Pass Trail is to type in “Seven Sacred Pools via Cibola Pass Trail” on AllTrails. Once you get to the Seven Sacred Pools on the Soldier’s Pass Trail, you can then enter the Soldier’s Pass Cave Spur trail into your app.
AllTrails Pro Tip
After going on a few hikes myself and talking with other hikers, I have concluded that the distances and elevations listed on AllTrails are not always accurate. I believe this is because people are allowed to submit new trail routes and updates, so the trail maps are largely based on people’s hiking experiences vs. calculating distance via coordinates the way that Google maps does.
Because of this, all the distances mentioned in this blog post will be based on Google maps, not AllTrails.
- Keep in mind, the new routes and updates ARE verified for accuracy via app moderators before they are uploaded to AllTrails.
Hiking Soldier’s Pass Trail and Finding the Hidden Cave
Soldier’s Pass Trail Landmarks
Once you get on Soldier’s Pass Trail, there are a few landmarks to watch out for to make sure you’re headed in the right direction and give you an idea of how close you are to the cave:
Devil’s Kitchen Sinkhole
You will approach Devil’s Kitchen Sinkhole relatively early on in your hike. Located 0.2 miles from Soldier’s Pass trailhead, it is on the right hand side of the trail and pretty difficult to miss. It looks exactly like what you would imagine: a massive hole in the ground covered with rocks, dirt, and some greenery.
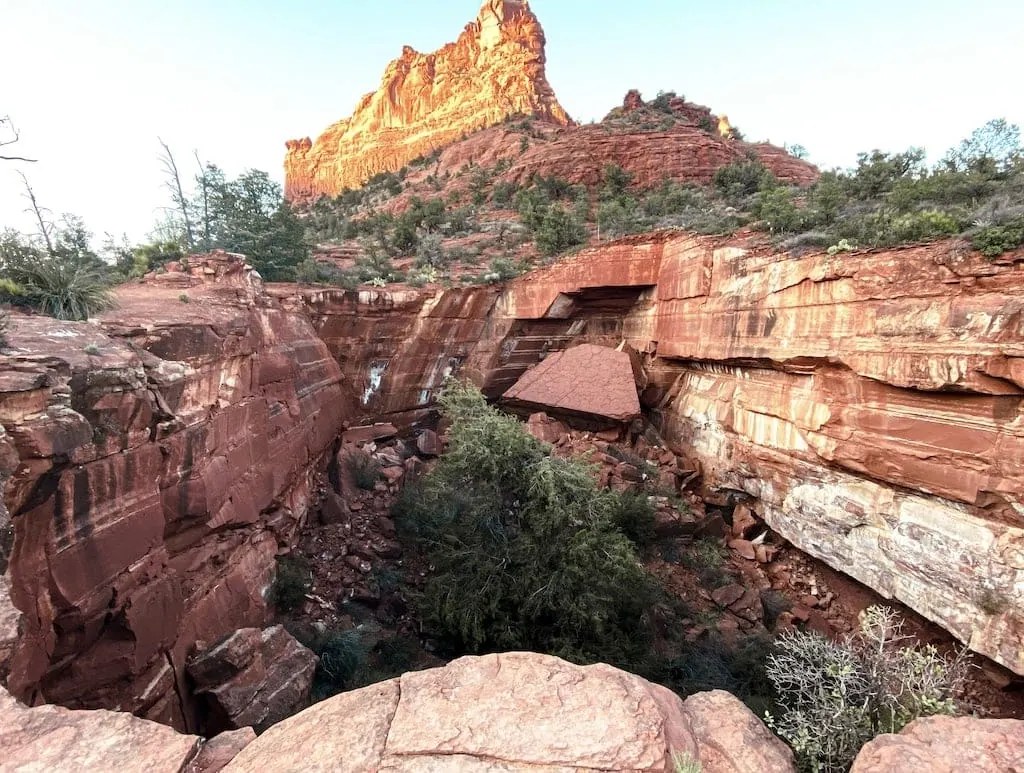
(Also, I don’t know why the rock at the very top is neon orange. The sunset must have been wild. Maybe my camera is terrible. Or maybe it’s just a liar. Anyway – don’t get excited over neon rocks. They aren’t real.)
The Seven Sacred Pools
The next landmark you will come to on Soldier’s Pass Trail is the Seven Sacred Pools. This is located 0.4 miles from Devil’s Kitchen Sinkhole.
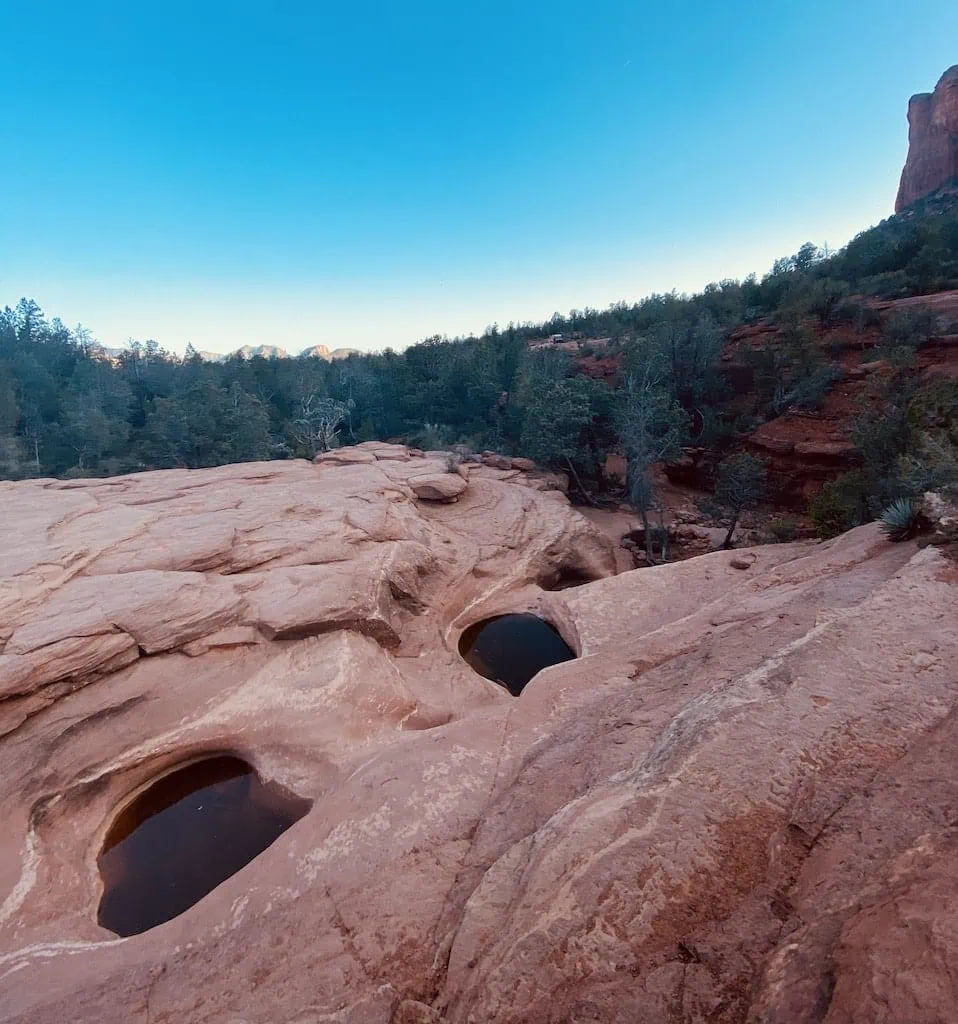
The Seven Sacred Pools are natural pools (think of way oversize puddles) in the rocks that are filled with natural water. They are called “sacred” because the Native Americans that inhabit Sedona consider them so. In my opinion, the best time to see them (and photograph them) is after the sun has started to set.
- Before going on this hike, I read where a lot of people found the Seven Sacred Pools somewhat underwhelming. Although they are beautiful, after seeing them myself, I would have to agree. However, I also saw the pools when Sedona was not experiencing a lot of rainfall.
- I have seen photos where the water from each of the higher pools cascades down into the lower ones like a waterfall. I think it would be fascinating to experience them like this after it has rained!
Finding the Hidden Soldier’s Pass Cave
After you reach Seven Sacred Pools, it is 1.8 miles to the hidden spur cave. You will know you’ve reached it when you see a large wall of rock with 2 openings. You will also have to climb up a somewhat steep hill of dirt and rocks in order to get to the entrance. If your shoes don’t have good traction, this part could be difficult.
- As I mentioned, there are 2 openings in the wall of the cave. I attempted to go to the one on the left first, and this was NOT the correct one. If you accidentally try to get in this way, you’ll quickly realize that while this is a cool little nook in the side of the rock, it is NOT the opening of the cave. If you’re looking at the wall of rock, the opening to the cave is towards the RIGHT side.
Once you get to the entrance of the cave, you will see the way to get up inside is narrow, steep, rocky, and could require some effort in the form of upper body strength. There aren’t a lot of good places to hold onto in order to pull yourself up. I stumbled into 2 guys during this hike, and we all helped each other figure out how to get up into the cave. You basically have to stand on some of the rocks and hoist yourself up until you make it inside. This is the hardest part of hike, but 100% worth it.
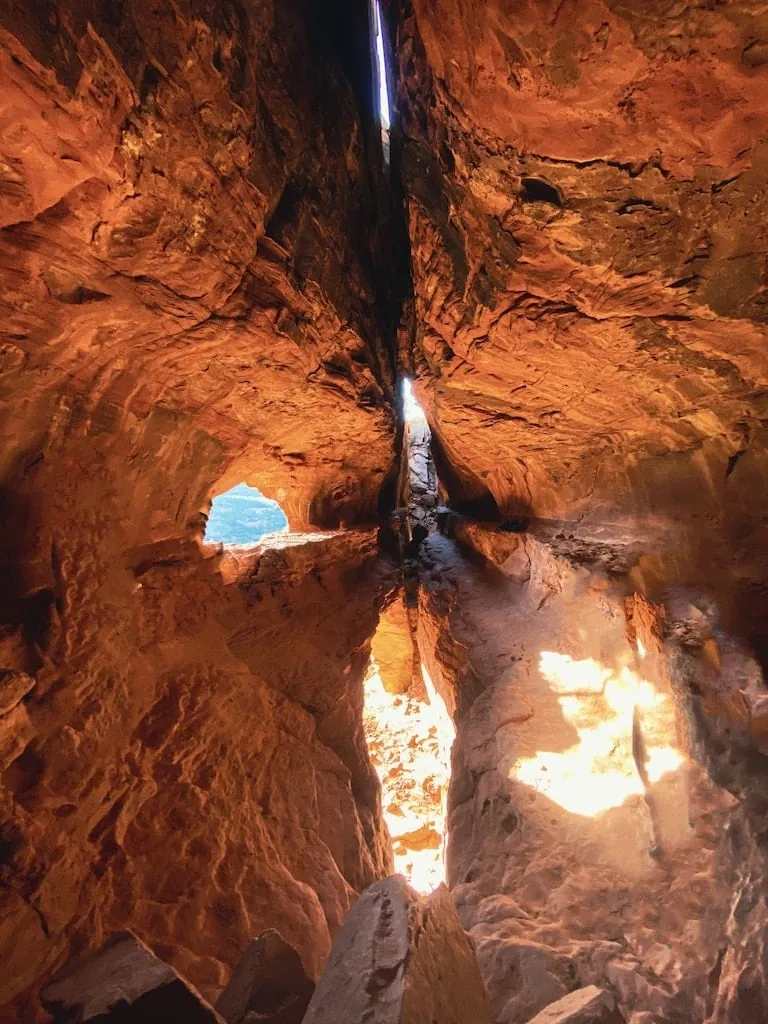
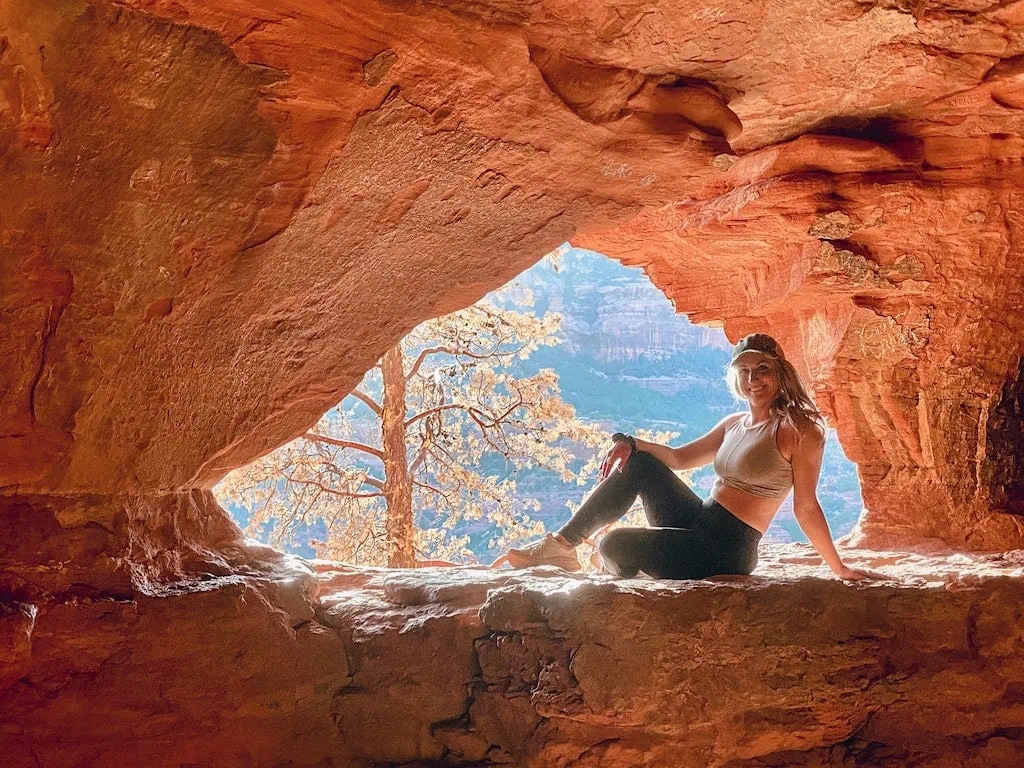
Once you get up inside the spur cave, this is your view! I think it looks like someone chopped down a tree, hollowed out the inside, and made it into a time machine. There’s even an opening in the wall of the cave that you can sit on and look out into the forest! The lighting wasn’t the best in this picture below, but the background and the details make for a great photo op.
