If you have looked up hiking in Arizona, it is possible you have come across or heard of the hidden “subway cave” on the Boynton Canyon trail in Sedona. Located off of the beaten path, this cave is unlike anything many hikers have ever seen before and is nature’s true version of a New York City subway. If you’re like me, you put this hike at the top of your list the moment you found out the subway cave in Sedona existed.
But this cave is referred to as a “hidden” cave for a reason – the location isn’t exactly obvious if you don’t know where to look for it. That’s why I’ve put together this quick guide to finding the subway cave – including tips for hiking the Boynton Canyon trail – so you can experience the “WOW” moment for yourself.
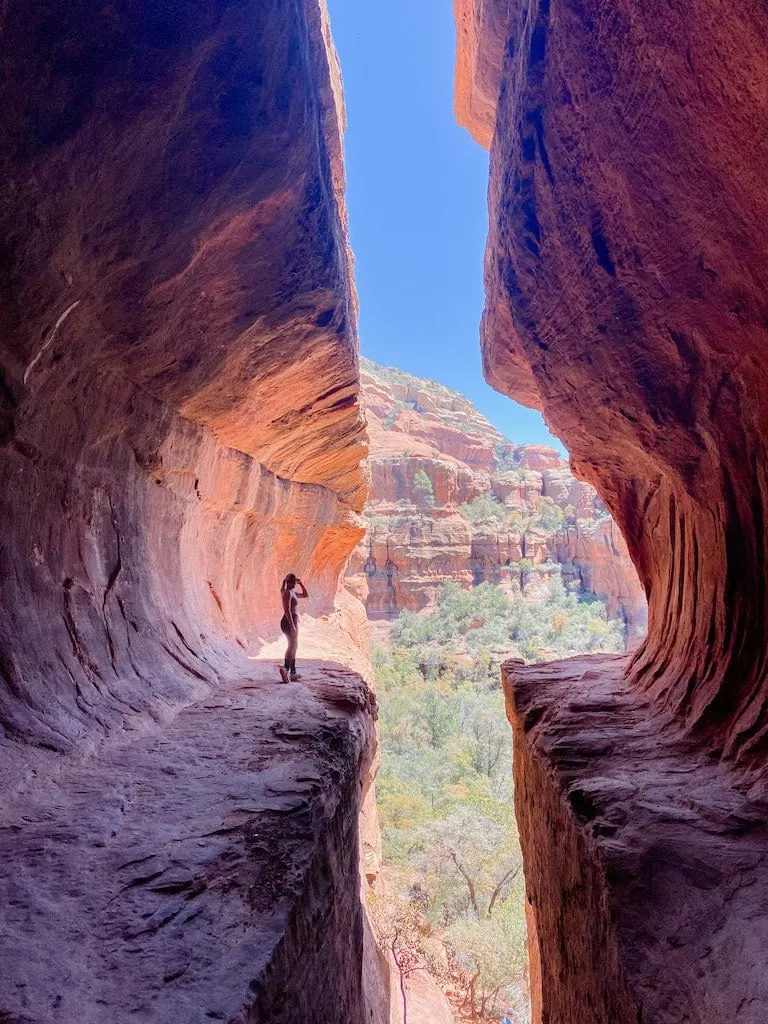
- Fun fact: I actually didn’t learn about this cave until I was on the Bell Rock trail and met a fellow hiker who was telling me about some of the hikes she did on her trip! Abbey, if you’re reading this, this post is dedicated to you!
HIKING ETIQUETTE: LEAVE NO TRACE
Sedona’s beauty is hard to match, and that is largely due to proper hiking etiquette and following the Leave No Trace principles implemented by the city. These guidelines help to keep nature and the outdoors in the most preserved, pristine conditions possible. Before hiking and/or visiting, check out 7 of Sedona’s Leave No Trace principles here.
Hiking Tip: Get a Red Rocks Pass
In order to park at most trails in Sedona, you will need to purchase a Red Rocks Pass (an America the Beautiful Interagency Pass will also suffice). This pass needs to be displayed on the windshield of the vehicle, or it can be purchased online using the vehicle’s corresponding license plate number.
If you forgot your pass, you ARE able to purchase a Red Rocks Pass at the Boynton Canyon trailhead.
You are able to purchase a pass for 1 day, 1 week, or annually using the link above. Click here for more information about the Red Rocks Pass program.
Where is the Subway Cave in Sedona Located?
As previously mentioned, the subway cave is located on the Boynton Canyon trail. To get to the trailhead, simply type in “Boynton canyon trail” into Google maps and it will take you directly to the parking lot!
GOOD TO KNOW: There ARE bathrooms at the Boynton Canyon trailhead!
Parking at the Boynton Canyon Trailhead
Like many trailhead parking lots in Sedona, this one has a limited number of spaces. It is usually advised to get to the trailhead by 7am at the latest to secure a spot. If you are a hardcore hiker, that is what I suggest you should do. I am a hardcore breakfast person, so I got to the trailhead around 10am, after eating breakfast. *shrugs*
If there are no spots in the lot, you are able to park on the road close-by and walk to the trailhead. I did this, and my walk was less than half a mile.
Keep in mind, parking spots will open up throughout the day as hikers get finished their hikes. After talking to a few locals, I learned that 7am, 12pm, and 4pm were good times to be able to potentially secure a parking spot in a lot of the trails.
What to Bring With You on Your Hike
- Plenty of water (~3 large bottles)
- Sunscreen
- Protein bar (I always pack 2, just in case)
- Chapstick
- Cell phone + portable cell phone charger
- Hiking poles (I actually did NOT bring these, but I know they are a “must” for many hikers!)
Planning Your Boynton Canyon Hike
The Boynton Canyon hike is a longer hike, so be mindful of the time if you choose to start this hike later in the day. Below is a chart to help you plan
Boynton Canyon Trail Stats
| ROUTE | DISTANCE | TIME TO HIKE |
| Boynton Canyon Trail, no detours | 6.3 miles out-and-back | 2.5 – 4 hours |
| Boynton Canyon Trail with subway cave detour | 7.1 miles out-and-back | 4 – 6 hours |
| Boynton Canyon Trail with subway cave AND vortex detour | 7.5 miles out-and-back | 5.5 – 6.5 hours |
Hiking Boynton Canyon With No Detours
If you decide not to see the subway cave, you can certainly hike this trail and stay on the main path the entire time. Once I got finished seeing the subway cave, I turned around and hiked back, so I can’t speak to what the trail is like past the spot where you turn off to see the cave.
If you do want to hike the entire trail and take one or both of the detours, make sure you allow yourself enough time to do everything.
Detour Option: Boynton Vista Trail & The Vortex Site
The subway cave isn’t the only detour you can make on this hike! Boynton Canyon has a well-known Vortex site close to the start of the trail. The path to get to it is called the Boynton Vista trail.
To get to the Vortex site, when you get to the start of the trail, simply go straight at the sign that says “Vista” instead of going left to hike Boynton Canyon (see photo in the next section).
Hiking Boynton Canyon and Finding the Subway Cave
1. Starting At the Trailhead
Once you arrive at the trailhead, follow the path until you reach the sign that distinguishes the Boynton Canyon trail from the Boynton Vista trail. Here, you will follow the path to the Boynton Canyon trail towards the left. Make sure you have the AllTrails app downloaded to help you map out your route and know where to turn off to go to the cave.
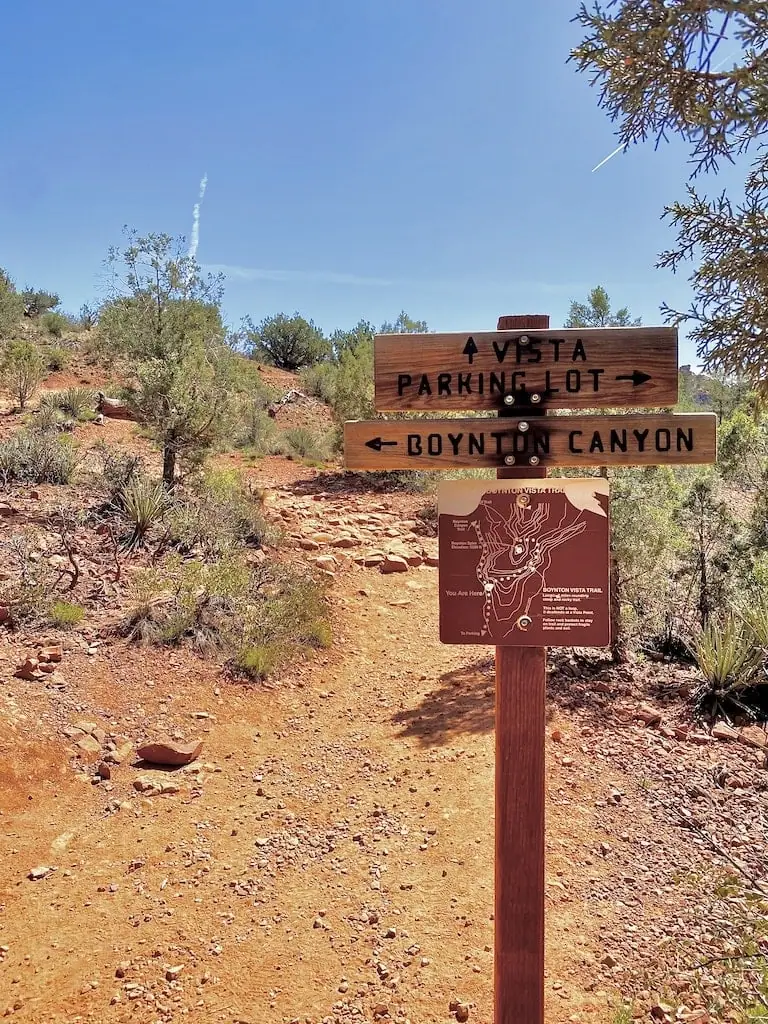
To see the Boynton Canyon vortex site, go straight (towards Vista)
2. During the Hike (Before the Subway Cave)
The trail through Boynton Canyon starts out as a wide path with sand. There is a lot of space, and it is relatively easy to walk through.
Once you get so far, the path narrows and starts to get rocky. From that point on, the trail remained this way throughout the majority of the hike. Sometimes, when passing a group of hikers, I had to stand off to the side to let them pass because the path was so narrow!
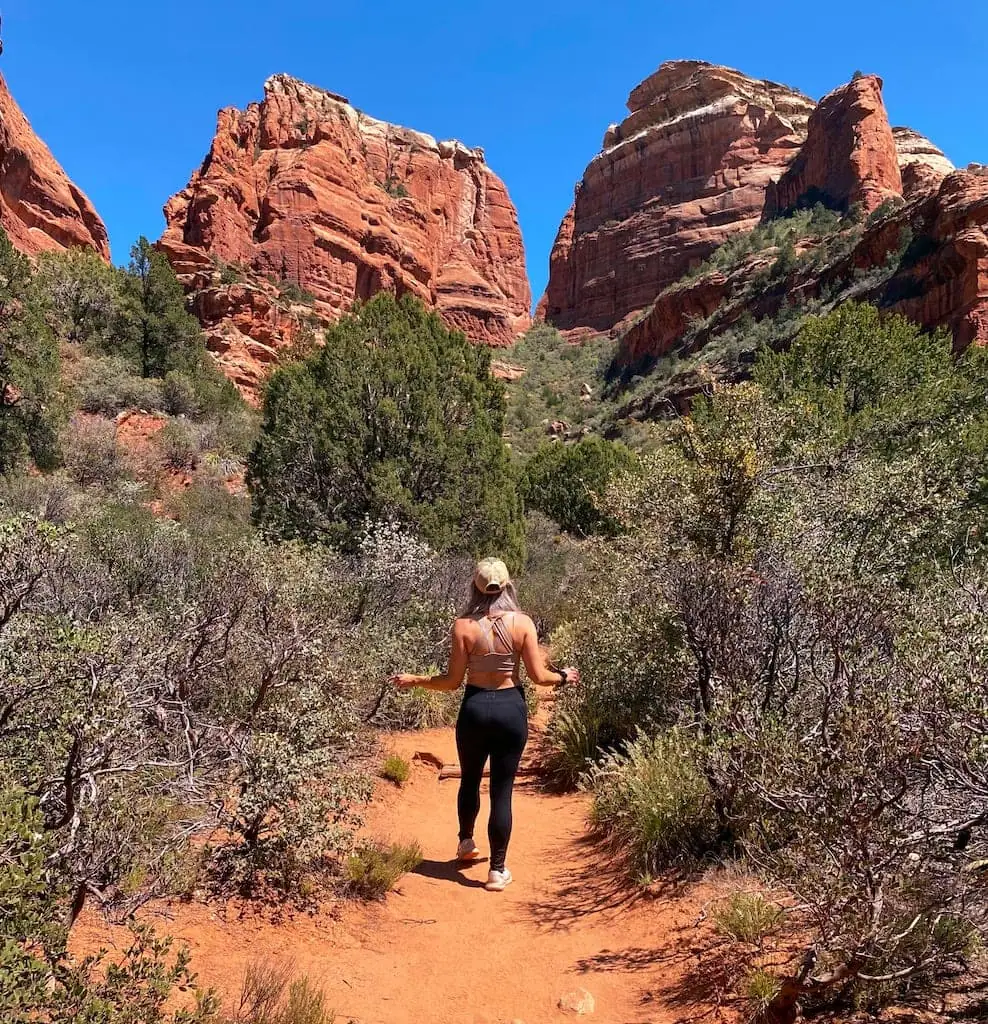
I don’t think I can adequately put into words how beautiful this hike is. The red rocks that are surrounding you just look absolutely unreal. I took so many photos, but don’t think any of them really do it justice. There were so many times that I just stopped and stared at the scenery around me.
- Another thing I really liked about this hike was that you were able to find shade! Throughout the trail, there were enough trees in certain areas that you were able to get out of the sun for a few minutes if you needed to.
3. Finding the Subway Cave
If you didn’t know the subway cave existed, you would never pay much attention to the concealed, ambiguous path right off the main trail. In order to find the subway cave, I will give you two main tips that you can use when hiking Boynton Canyon to ensure you don’t miss the turn:
- Tip #1 – On the AllTrails app, keep an eye on your distance. The spot where you need to turn off will be roughly at the 2 mile mark. You will see a dotted line off towards the right with “Cave” and a photo icon on your app.
- I have seen on other sites where some people have said it is closer to 2.4 miles. For me, I hit it right at the 2.06 mile mark.
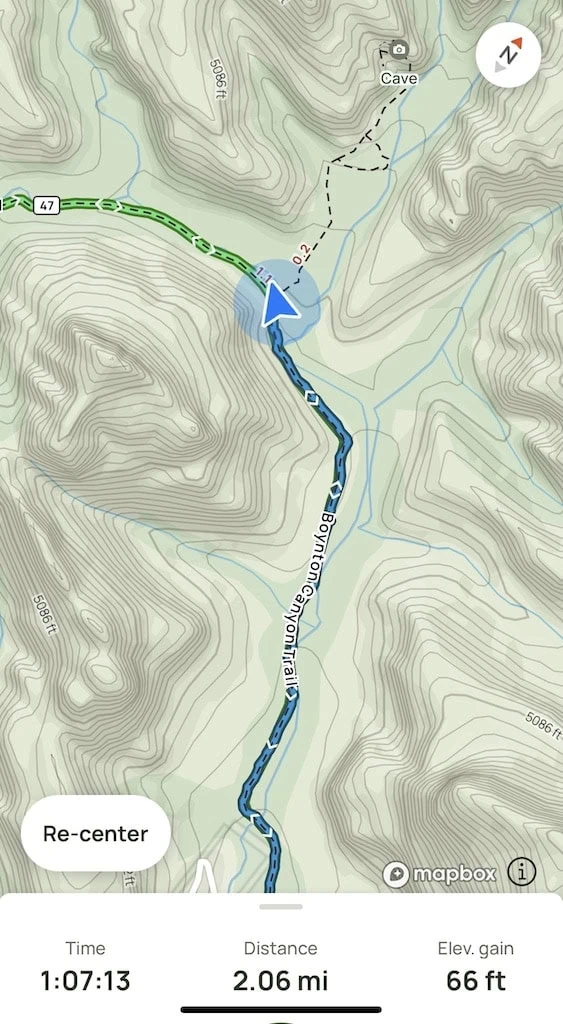
- Tip #2 – Right near the 2 mile mark, there will be a large alligator tree (appropriately named because of its bark that resembles alligator skin).
- This tree will be larger than a lot of the other trees you see on your hike, and it is what the majority of the hikers who know about the cave watch for to know when to turn off.
- The location of this tree should be consistent with your AllTrails map. Here, you need to turn RIGHT.
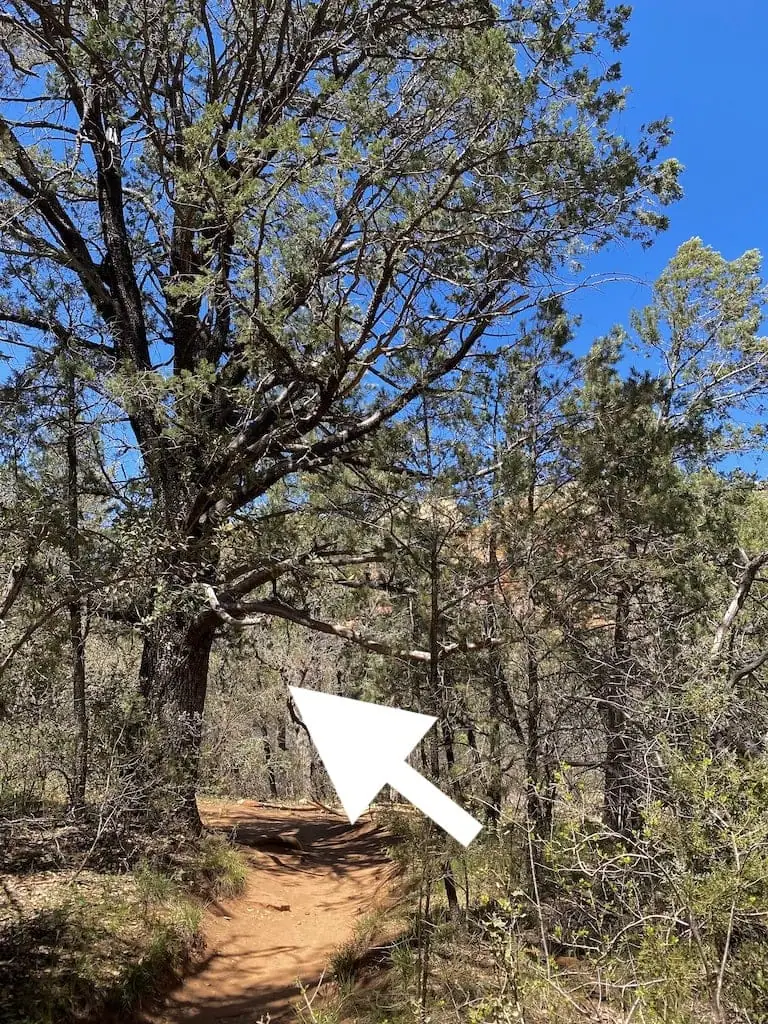
Once you turn RIGHT at the alligator tree, you will follow a narrow, windy, rocky path up towards the cave. You will likely encounter other hikers, especially once you get closer to the cave entrance. I kept an eye on my AllTrails app to make sure I was still headed in the right direction. You will know you have reached the subway cave once you see a narrow opening in between 2 large walls of rock (pictured below in the next section).
- Hiking Tip: Even though the alligator tree is definitely large, in my opinion, it didn’t stand out enough amongst everything else on the hike that I would have been SURE it was where I was supposed to turn off if I didn’t have the AllTrails app.
4. Getting Into The Subway Cave
The hardest part about seeing the subway cave is climbing up into the cave itself. There are 2 different ways to get up inside the cave:
One way is you can climb up a steep pile of rocks in between the opening of the cave on the right. Or, you can go off to the left and climb up the back side of the cave, which is the easier route.
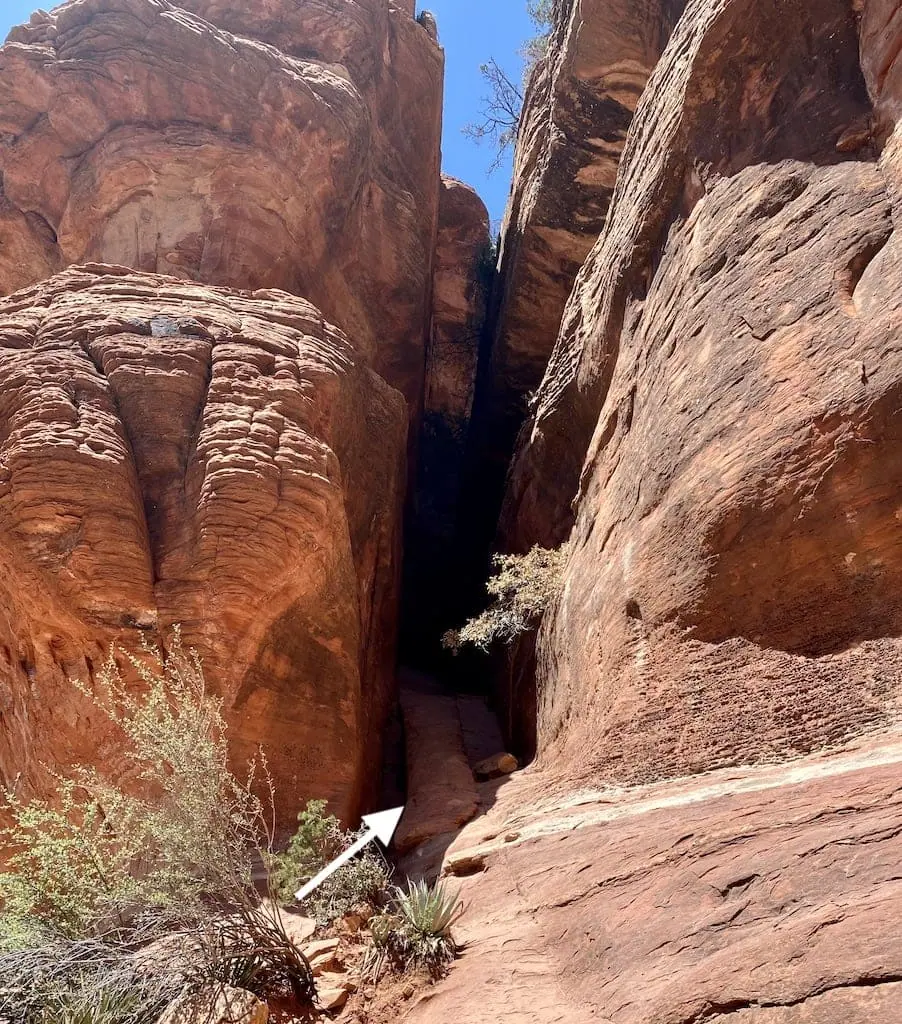
I decided to climb up the steep pile of rocks because I like to live on the edge (actually, I just like to challenge myself. Or is that the same thing? Whatever.)
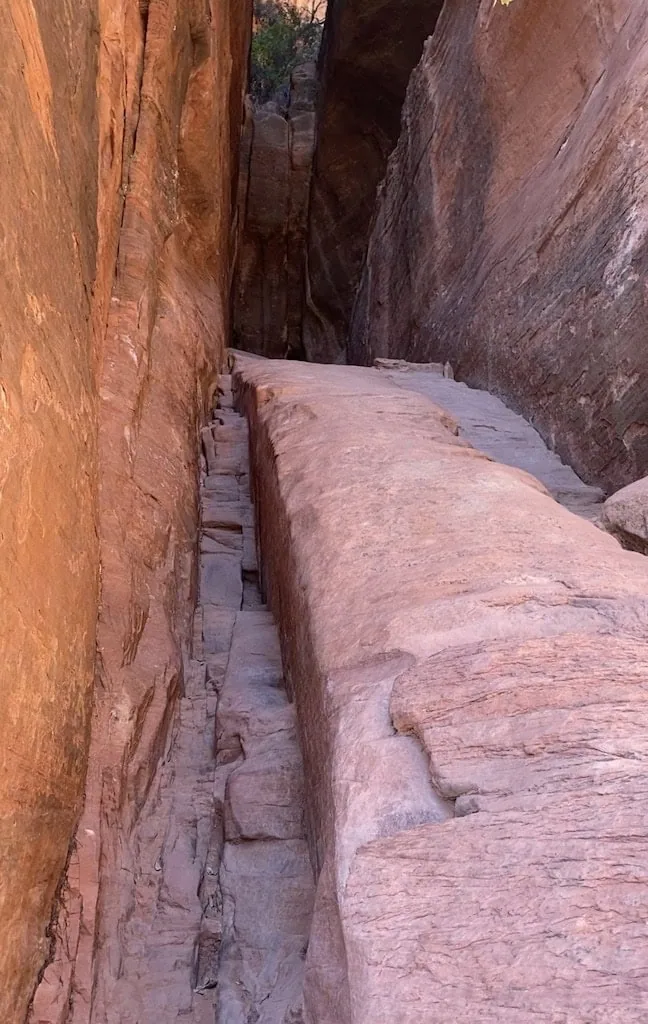
I will admit, climbing up these rocks is the only time during this hike that I felt afraid. After some trial and error, I eventually made it all the way up, but damn. As a solo traveler/hiker, I would not go up this way by myself again.
Below is a close-up photo of what climbing up the rocks looked like. As you can see, the sides are narrow and there’s not a lot of places to grip onto, which makes getting up this way difficult.
The below photo shows the entrance to the cave from the back side towards the left. This is a less dangerous route to go and the way I would now recommend that you climb up. You will likely see a lot of hikers climbing down this way, which will help you figure out the best way to get up and inside the cave.
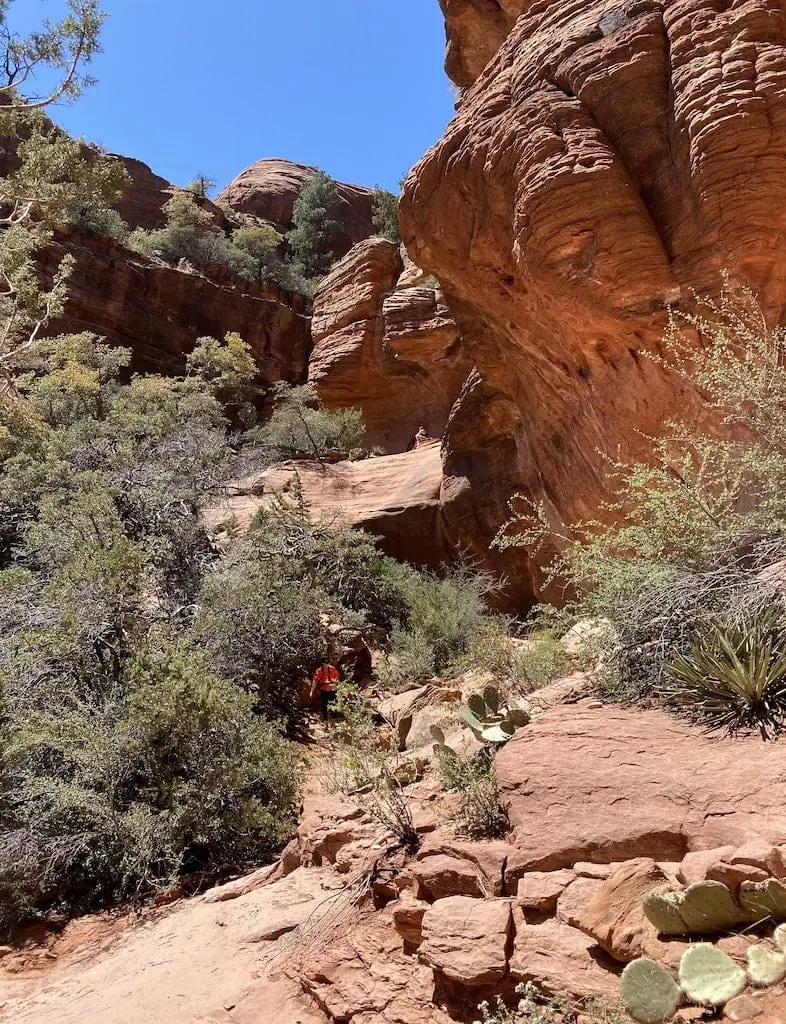
Once you get up into the subway cave, you will be able to walk around and get some epic views of Sedona and the red rocks. There are SO many good photo ops inside this cave! The following photos, taken on the edge of the subway cave from alternating sides, will help show why I loved this hike so much!
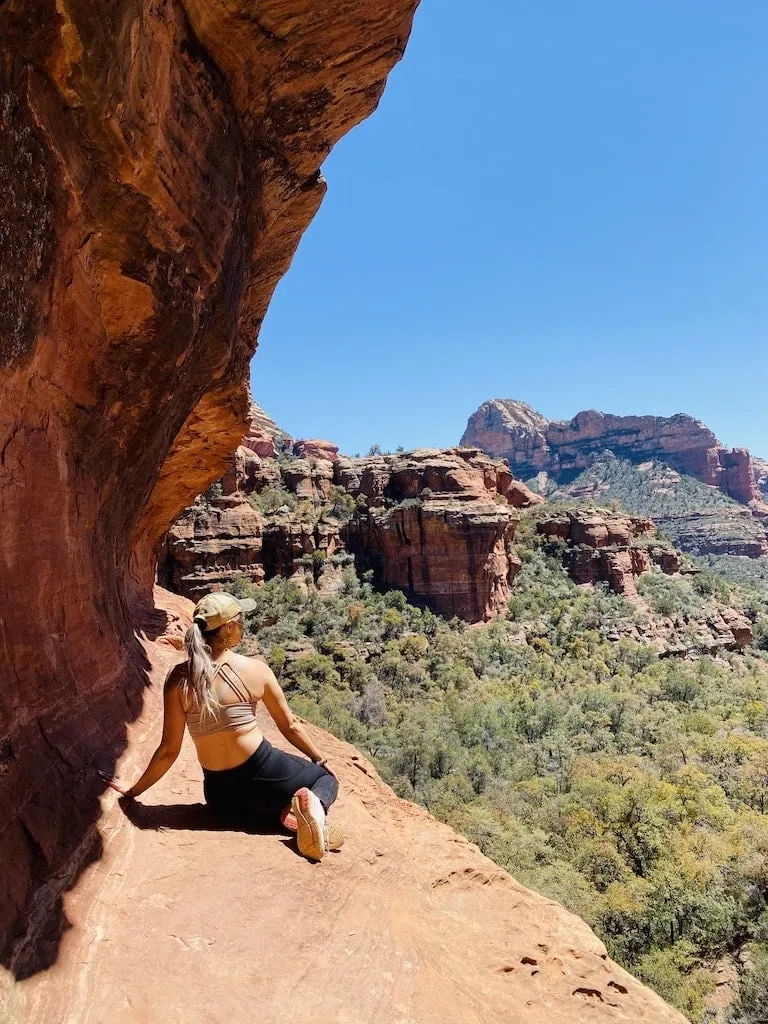
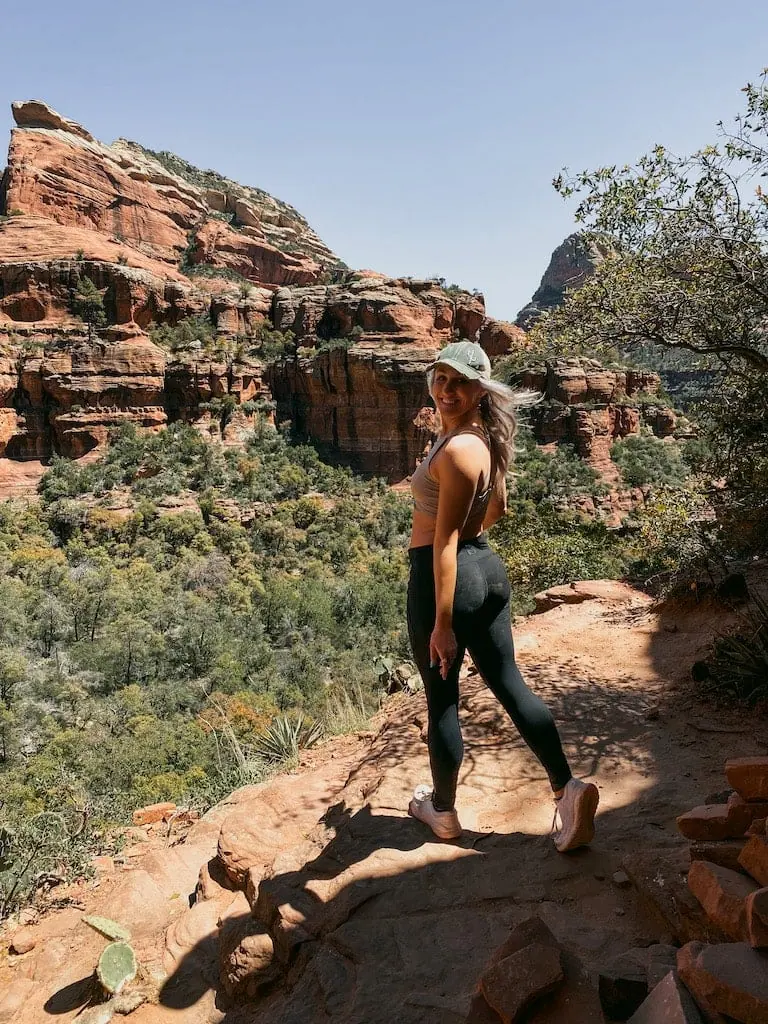
You could spend so much time in this cave just taking it all in. I probably spent an hour in here total. Once you are done, you can follow the AllTrails app back out to the main path of the cave and either continue to the end or head back to the parking lot.
Don’t forget to check out the Vortex site on the Boynton Vista trail if you didn’t already see it on your way in! Between the subway cave, the vortex site, and the overall stunning scenery of the red sandstone rock walls, this was my favorite hike that I did in Sedona.
If you have any questions about this hike (or, if you loved it as much as I did!), feel free to comment below!







What a hidden gem of a hike! Sedona is on my bucket list so I will have to find the subway cave when I visit.
You definitely should! It was my favorite hike I did. Sedona is 100% worth visiting!
Great read about a great hike. This part of the country is exquisite to explore – the scenery is so beautiful and words cannot describe it sometimes.
I could not agree more!! Thank you! 🙂
I love Sedona! I’ved hiked several trails there but haven’t been to the Subway Cave yet — now that it’s on my radar though, I definitely wanna go back someday to hike it! Thank you for this post!
You’re welcome! You should definitely add it to your list for next time – it was amazing!
What an adventure! Such helpful tips – I hope to visit Sedona – so thanks!
Thank you so much! I love Sedona so much – please reach out with any questions when you are ready to plan your trip!
These colors are unreal! This looks like a stunning hike, as long as you actually FIND the hidden gem, hehe 🙂
YES! It was quite a hike but SO worth it! I recommend it to anyone going to Sedona!
Thanks for this guide – Subway Cave is high on my Sedona bucket list. Also I definitely recommend hiking poles – they make hiking so much easier. 🙂
Hi Rachel! I’m so glad you found this guide helpful! 🙂 I probably will invest in hiking poles at some point, haha! Thank you for the advice!
We followed your instructions exactly for my husband and my hike yesterday! Perfect! Thank you!
Hi Leah!! Thank you so much for your comment – I’m so happy this post was helpful for you! I hope you love your time in Sedona <3 -Gina