


Sedona, Arizona is one of my favorite places in the world to travel. If we haven’t met, I’m Gina, and I’m an aesthetic traveler whose idea of being outdoorsy is drinking outside on rooftop bars…until I came to Sedona. The red rocks quickly swept me off my feet and dropped me right back down into a pair of hiking boots. J/k, I still hike in sneakers, but that’s not the point. The point is, I can’t wait to tell you about all the best hikes in Sedona, along with photos, pro tips, and more.
- Related post: 10 of the Best Restaurants in Sedona, AZ
If you’re familiar with this blog, you probably have an inkling that a lot of my favorite hikes are based on the views and surprises hidden on some of the trails. Wait…surprises? Oh yes – we’re talking hidden caves and gorgeous unexpected archways/rock formations. If you have any questions about the hikes I’ve mentioned, feel free to use the Contact Me form at the bottom or message me on Instagram. I’ve also included a hiking trail summary list towards the end of this post that breaks down each trail by category.
My Top Sedona Hiking Tips
- Download AllTrails – The AllTrails app is essentially a GPS for hiking. You can use it to look up popular trails and plan your hike accordingly. The Navigation feature allows you to follow the trail as you hike. Bonus: you can see other popular spots (ex: vortex sites) along the way.
- Get a Red Rocks Pass – Many of these hikes require a Red Rocks Pass in order to park at the trailhead. AllTrails is usually pretty good about telling you which ones require a pass. Almost all of the trails requiring a pass will have a kiosk where you can purchase one using a credit card.
- Know what to bring with you – Check out my Hiking Essentials at the bottom of this post.
1. Boynton Canyon Trail (+ The Hidden Subway Cave)
- AllTrails Name: Boynton Canyon Trail
- Rating: Moderate
- Distance: 7.2 miles (for entire hike; shorter if you just go to find the cave)
- Time: This hike took me roughly 4-4.5 hours, including time for photos
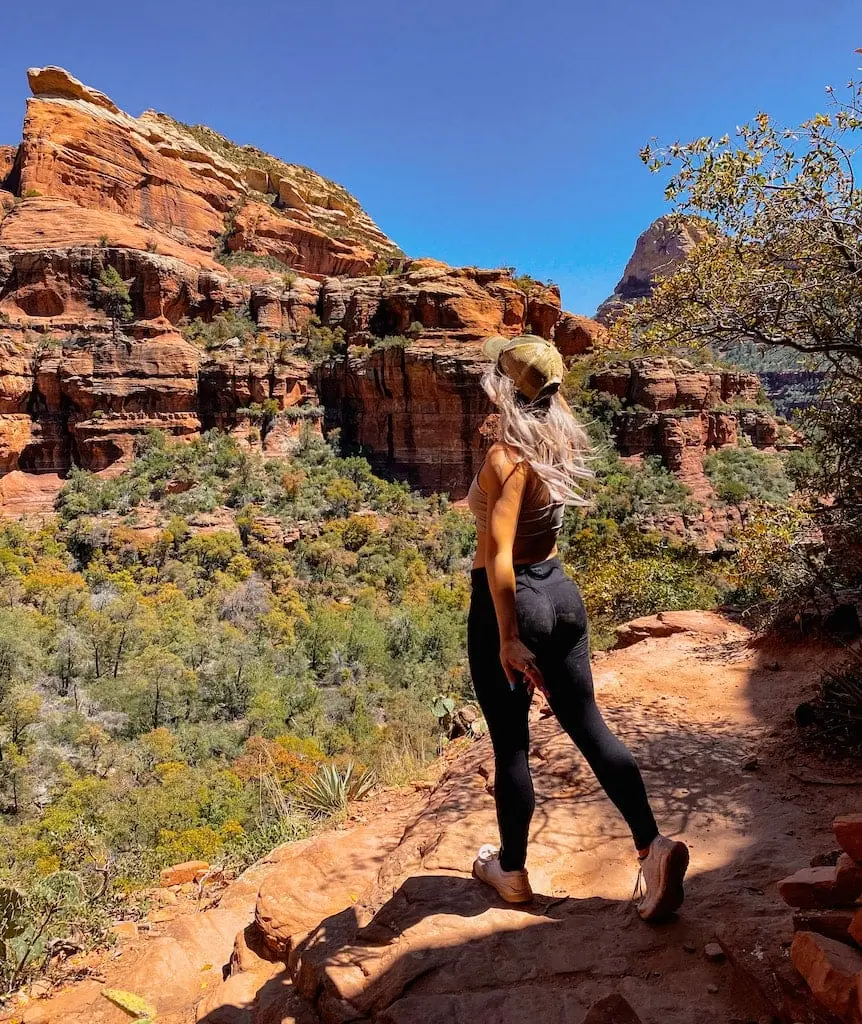
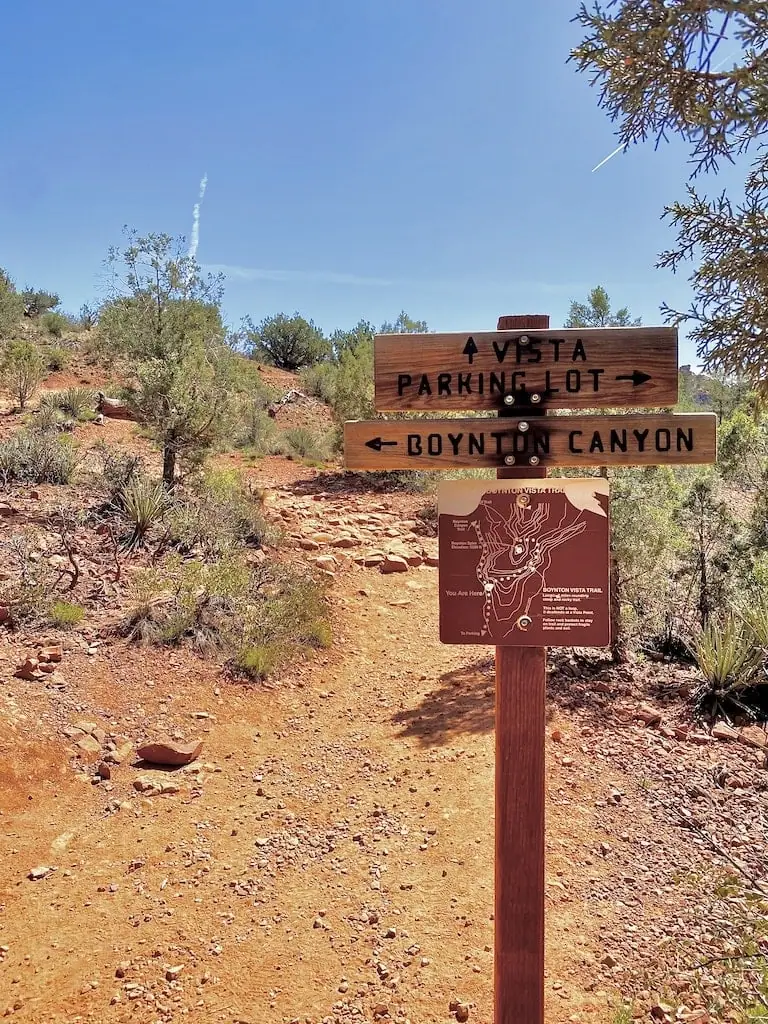
The Boynton Canyon trail was my absolute favorite hike I did in Sedona. I loved everything about it, starting with the drive down to the trailhead. Once you turn onto Dry Creek Road, you’ll see what I mean.
- Pro Tip: Dry Creek Road is the road you will take to get to a lot of different trailheads in Sedona that are out this way. I absolutely love this drive and think it’s one of the prettiest ways to see the red rocks.
IMO, the trail has stunning views from start to finish. You are constantly staring at red rocks, and there are plenty of Instagram opportunities. If you’re hiking solo, bring your tripod!
This trail is somewhat long if you intend on doing the whole thing. I went with the intention of finding the subway cave, so I didn’t finish the entire trail.
Boynton Canyon is also home to a popular vortex site that many people like to explore. To know where to find it, along with all of my other pro tips for this hike, check out my post 7 Tips for Hiking the Boynton Canyon Trail in Sedona, AZ.
Finding the Boynton Canyon Subway Cave
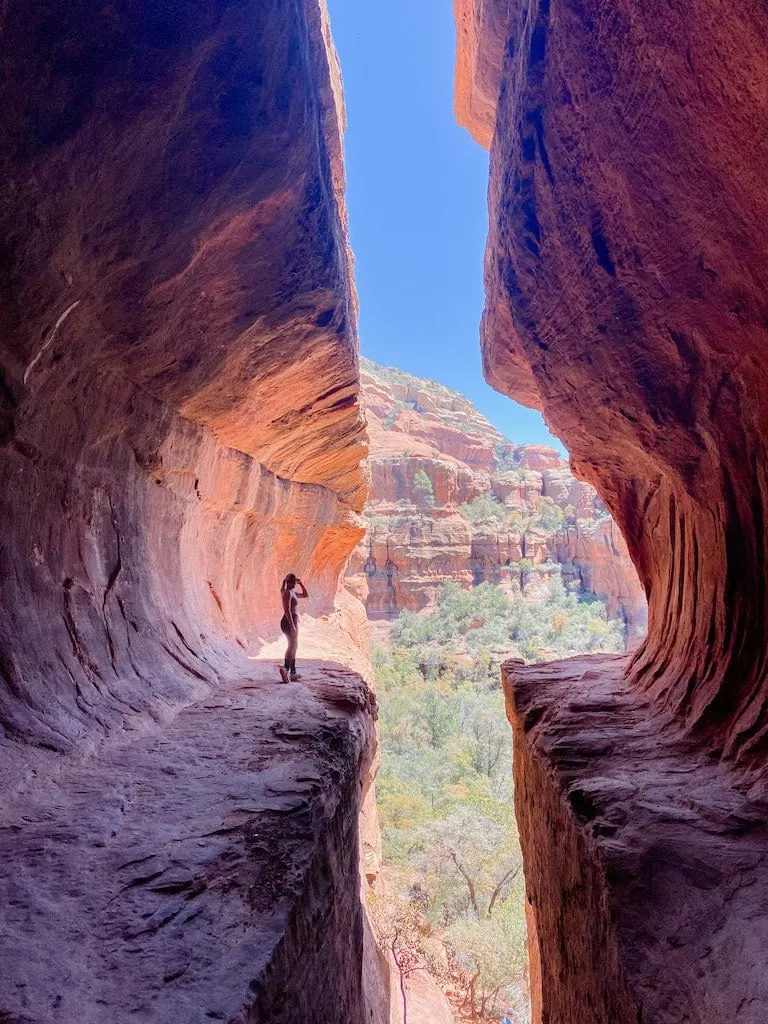
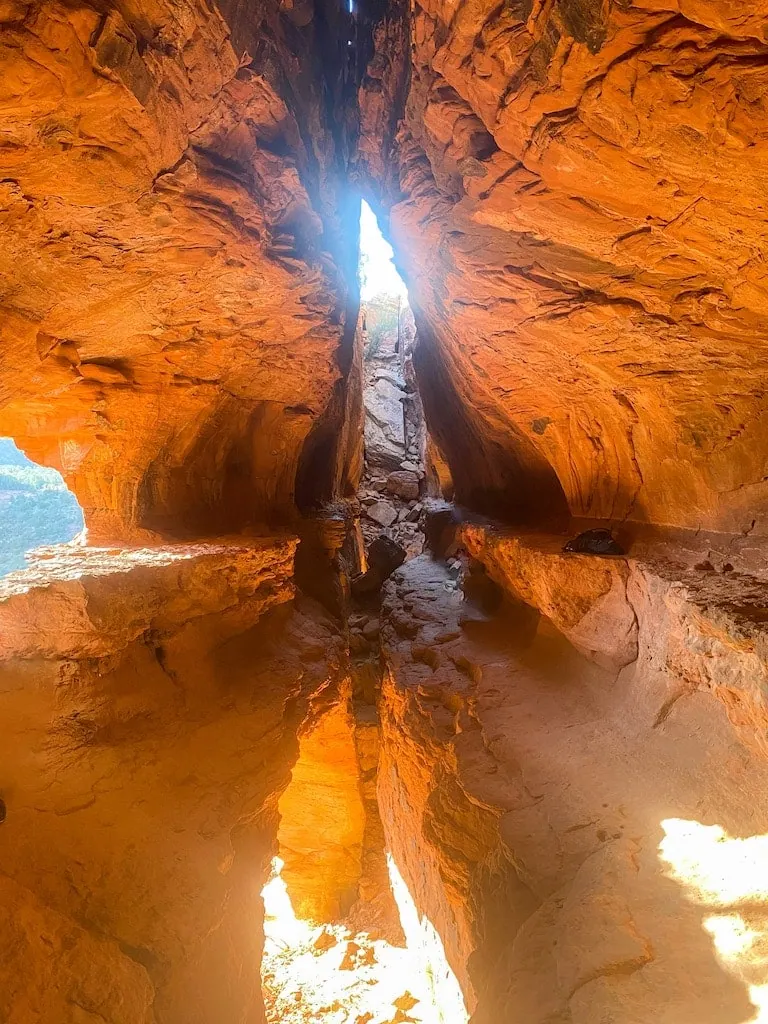
The hidden subway cave was hands-down my favorite part of the Boynton Canyon trail hike. It is absolutely unreal to think something like this actually exists in nature. To know the exact spot you need to turn off to find the subway cave, check out my post How to Find the Boynton Canyon Subway Cave in Sedona, AZ.
2. Soldier’s Pass Trail (+ The Hidden Spur Cave)
- AllTrails Name: Seven Sacred Pools and Soldier’s Pass Cave Trail (if you want the cave route); Soldier’s Pass Trail (if you want the full trail route)
- Rating: Moderate
- Distance: 3 miles
- Time: This hike took me roughly 1.5-2 hours, including time spent hanging out in the cave and taking photos.
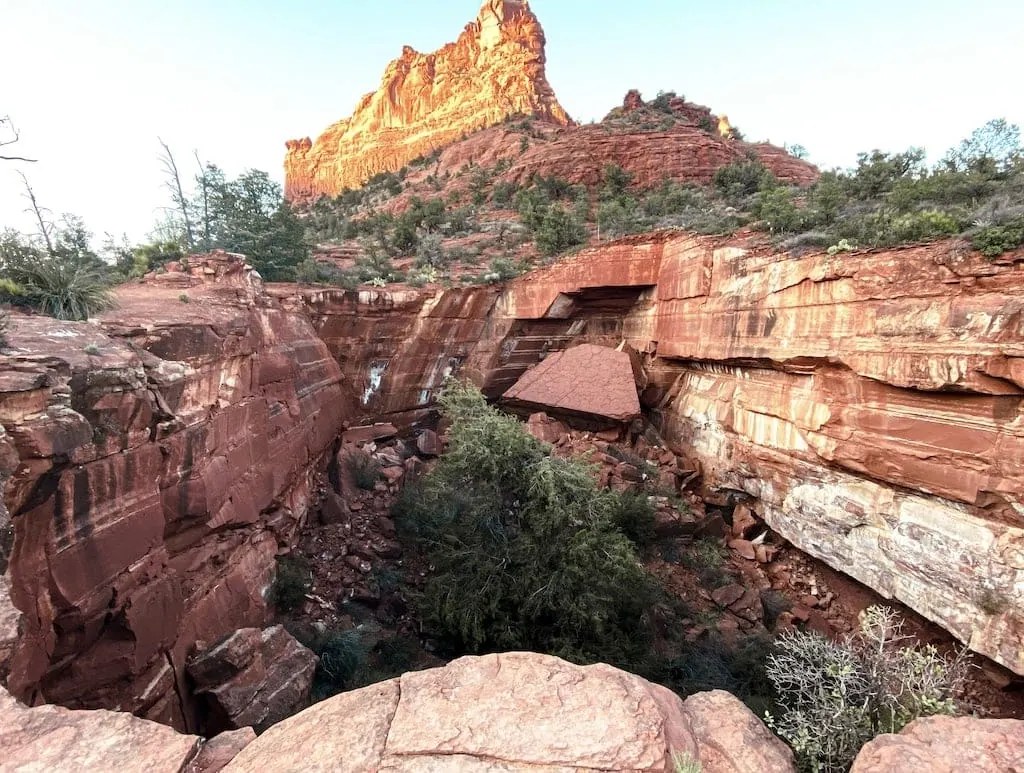
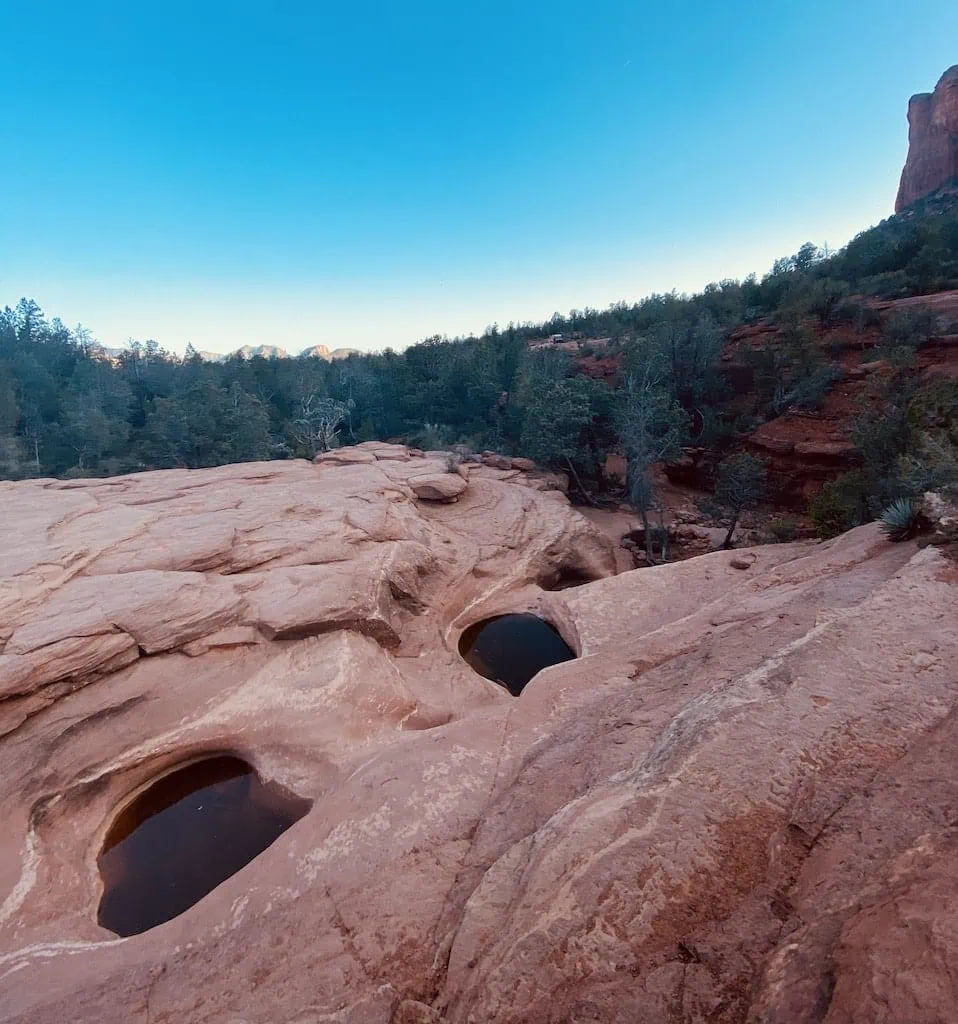
I love hiking Soldier’s Pass Trail because there’s just so much to see. Devil’s Kitchen Sinkhole. The Seven Sacred Pools. A SECRET CAVE?! I’m screaming. But yes, it’s there. All of it.
Soldier’s Pass is a good hike to do because it’s relatively short and doesn’t have many hills (unless you’re climbing into the cave). The different landmarks that I just mentioned are also good ways to verify that you’re on the right path. I also saw plenty of families with kids while I was doing this hike, and I agree that it would be a fun one to do with kids!
Finding the Hidden Spur Cave on Soldier’s Pass Trail
If you want to find the secret cave on Soldier’s Pass Trail (and why wouldn’t you, because it’s super cool)…check out my other post, How to Find the Hidden Cave on Soldier’s Pass Trail. This post also walks you through parking options for the trail, and gives you a little bit more in-depth detail about hiking Soldier’s Pass Trail in general.
- Pro Tip: I have also seen the name of this hike be called Soldier’s Pass Spur Cave on AllTrails, but at present time, it is Seven Sacred Pools and Soldier’s Pass Cave Trail.
3. Cathedral Rock
- AllTrails Name: Cathedral Rock Trail
- Rating: Moderate
- Distance: 1.2 miles
- Time: AllTrails doesn’t list a time; IMO, it depends how high you want to climb!
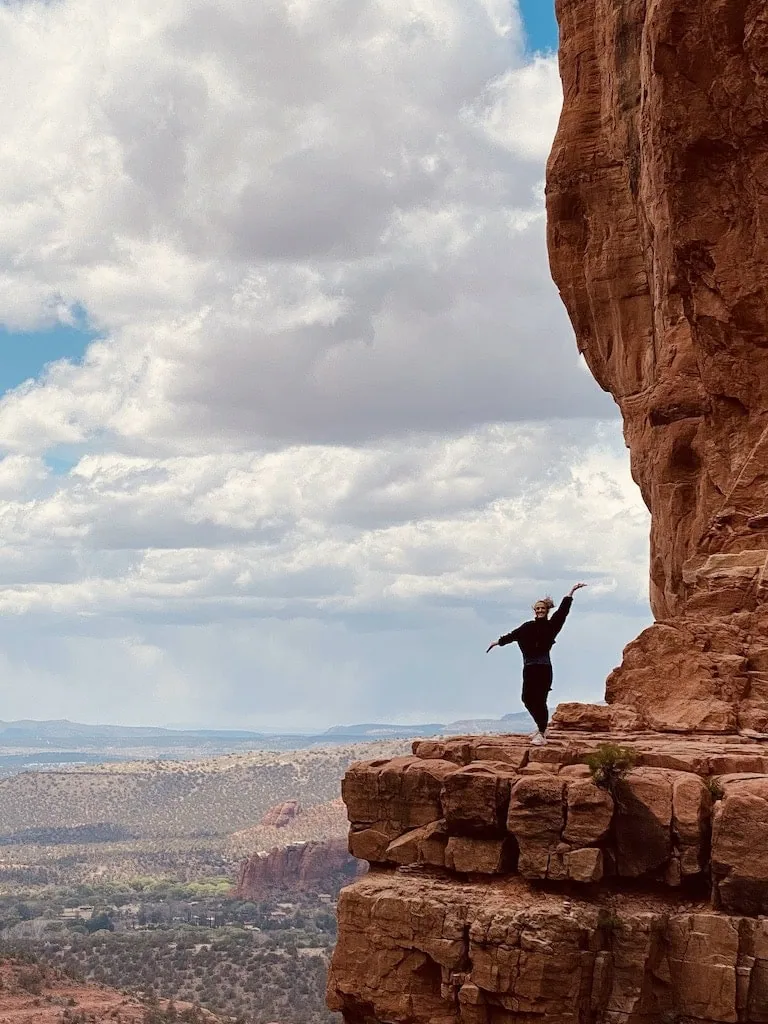
Cathedral Rock was the first hike I ever did in Sedona and is still one of my favorites to this day. The views at the top are incredible, but for those of you who are afraid of heights, know that you don’t have to go all the way to the top in order to get a stunning view of Sedona. You will be able to get beautiful pictures and scenery all along the way.
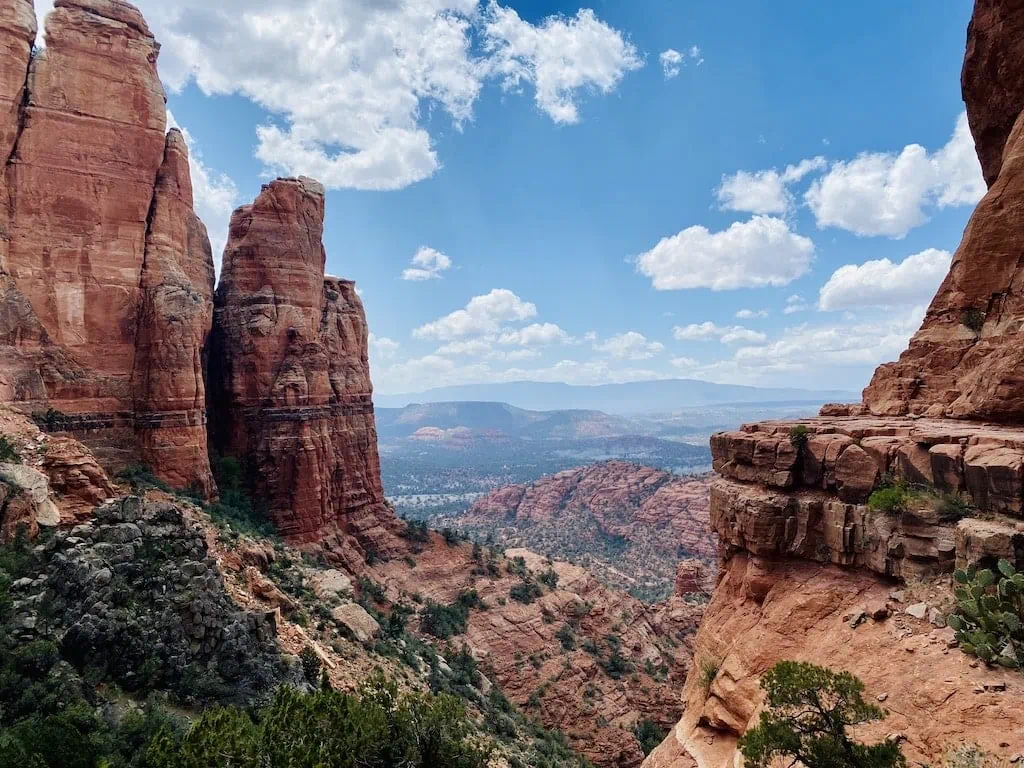
Once you get to the top of the trail, there will be a sign signaling that you are at the end. This photo is of me and my two friends (that I met while traveling!) at the top of Cathedral Rock.
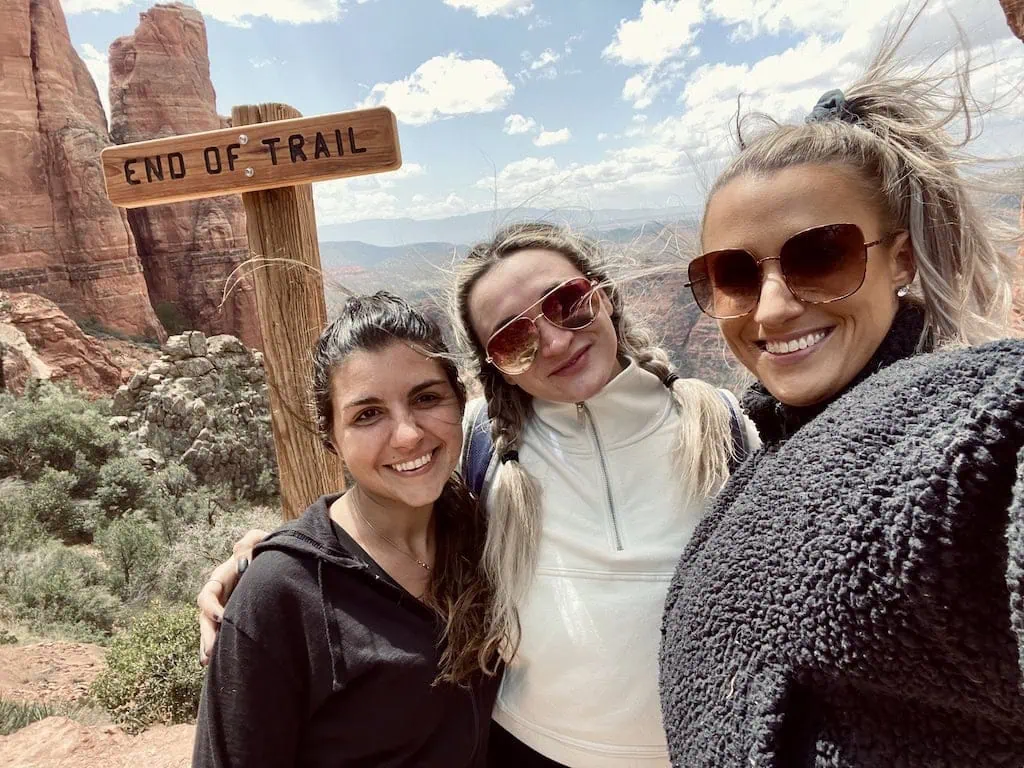
I found climbing to the top of the Cathedral Rock to be moderately difficult in some areas, but this was also the first time I had ever done a hike like this where you are climbing up a rock as opposed to just hiking on a trail. There were a few spots that I felt like I had to get creative in order to find my way up the rock. I talked to other hikers who said they also found it to be challenging, so that’s what I too will concede with.
- Pro Tip: The worst part about going to Cathedral Rock is finding parking. If you aren’t lucky enough to secure a parking spot at the trailhead on Back O Beyond Road, you can park offsite and take the Sedona Shuttle. Check the shuttle schedule before you plan your hike – it usually only runs on Thursday-Sunday.
4. Bell Rock
- AllTrails Name: Bell Rock Trail (there are multiple trails for Bell Rock that you can choose from, but this one is the simplest and will take you up onto the rock)
- Rating: Moderate
- Distance: 0.8 miles
- Time: AllTrails doesn’t list a time; IMO, it depends how long you want to hang out on the rocks!
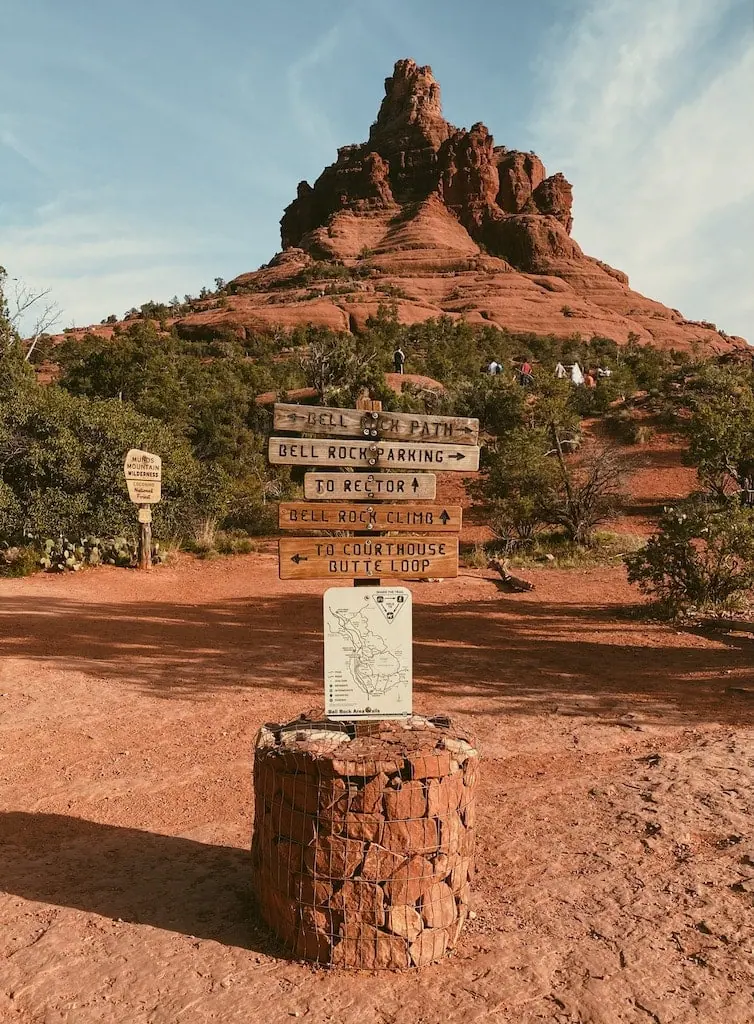
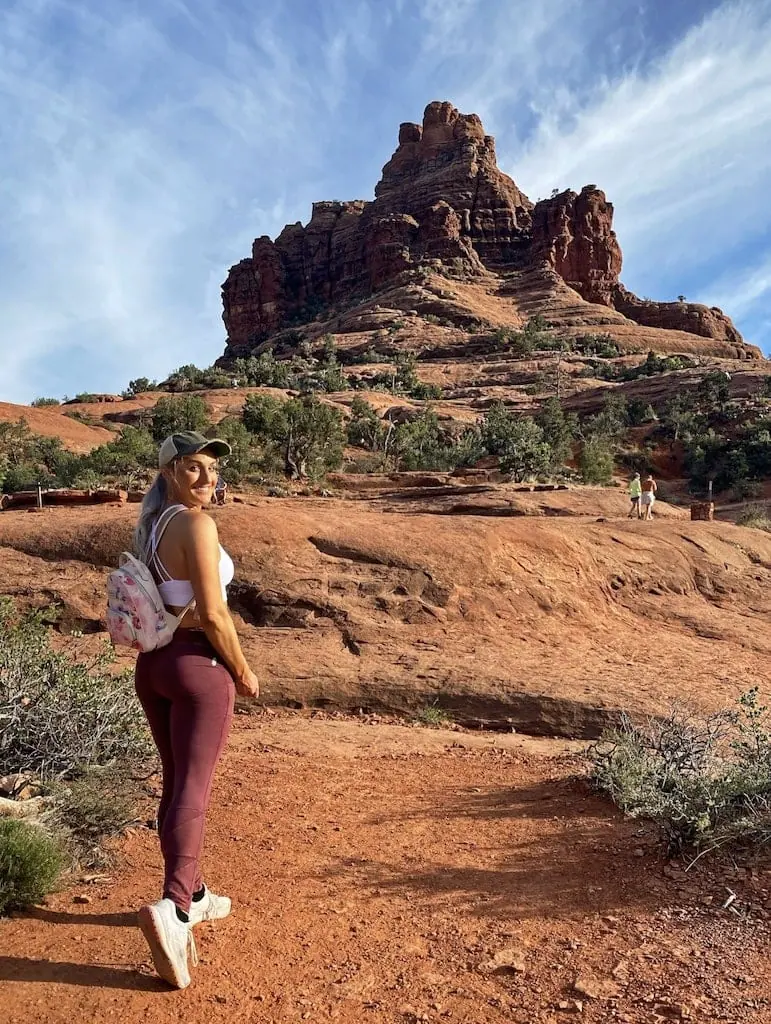
Bell Rock is another trail that is more of a “climb” than a “hike.” If you want to see Bell Rock but you would rather do a hike, you can do the trail called Courthouse Butte and Bell Rock Loop on AllTrails.
IMO, Bell Rock is the less intense version of Cathedral Rock. You still get incredible views, but you don’t have to climb quite as high. Plus, your vantage point (i.e. – what you’re looking out at) from the top of Bell Rock is different from what you see while climbing Cathedral Rock.
If you really want a good, zen time, get here around dusk and watch the sun set and the stars come out. Better yet, sit on the vortex and watch! The Bell Rock vortex is located on the north side of the mountain, and you will likely see a lot of people congregated here. IMO, the trail is not confusing enough that you would get lost on the way back down if you climbed down at dusk.
- Pro Tip: You have 3 parking options when trying to visit Bell Rock. The best place to park is the Courthouse Vista lot, aka “Bell Rock North”. If this lot is full, your other 2 options are the Courthouse Loop South Trailhead lot (aka Bell Rock South), and the Yavapai Vista parking lot.
- If you have to park offsite, the Yavapai Vista parking lot is about a 0.4 miles/9 minute walk to the trailhead. Courthouse Loop South is further – about 0.8 miles/14 minutes.
5. Devil’s Bridge
- AllTrails Name: Devil’s Bridge via Mescal Trailhead
- Rating: Moderate
- Distance: 3.9 miles
- Time: 1 hour + 40 min (longer with photos)
Devil’s Bridge is one of the most popular hikes in Sedona, so it is crucial to get there early. I was at the trail at 6:30am for this one, and by time I left the bridge the line was backing up to take photos.
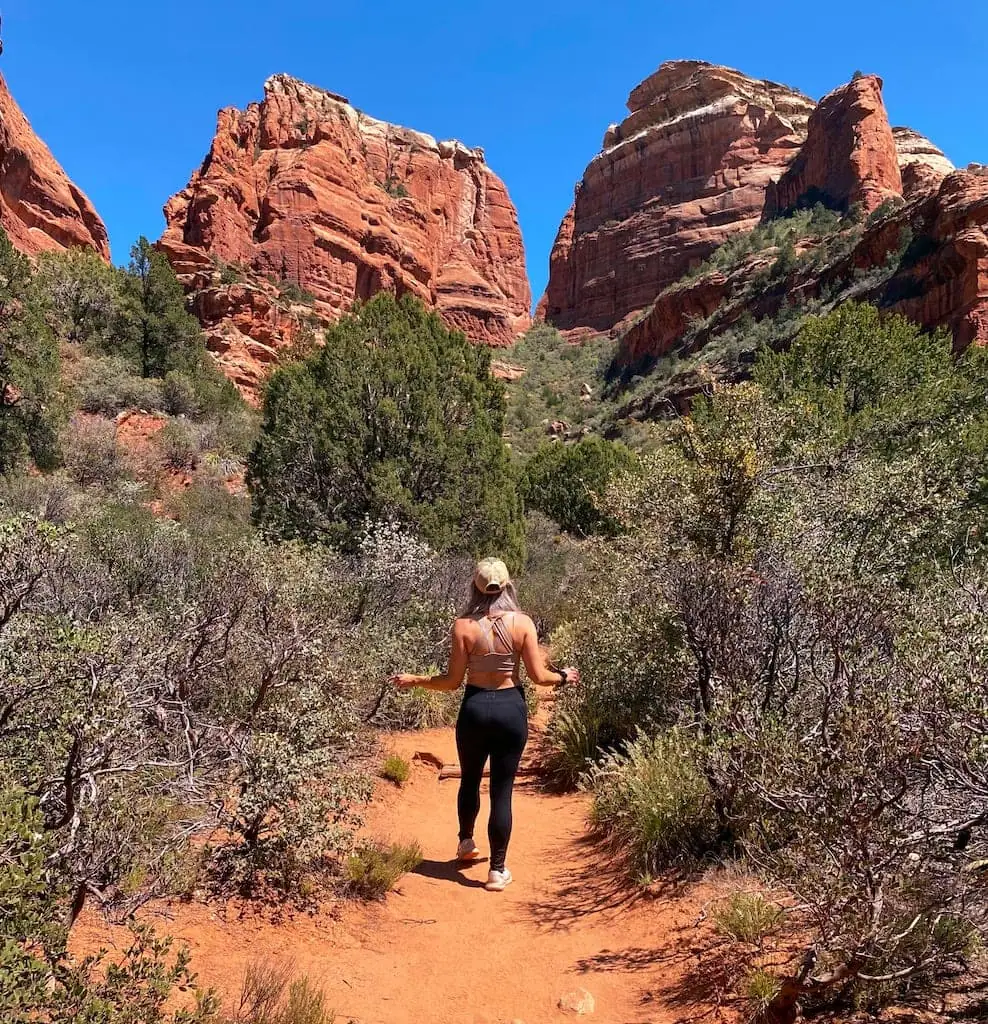
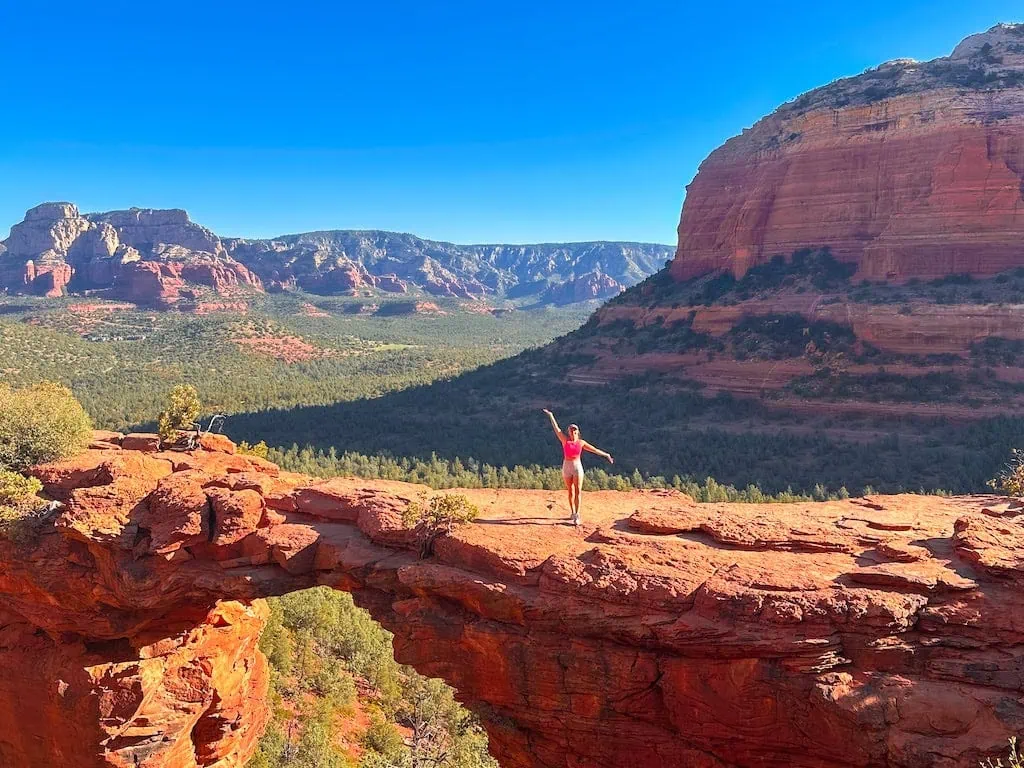
There are a few different trails you can take to get to Devil’s Bridge, but I opted for the one that starts at Mescal Trailhead. The Mescal hiking trail is a lot more narrow than the Devil’s Bridge one. Once you see the sign that you’re at the Devil’s Bridge trailhead, the path widens out and it’s very obvious that you’re on a different trail. In terms of views, there were a couple really pretty spots where you have a great view of the red rocks, but IMO, the entire path isn’t overly stunning until you get towards the top.
The only hard part about this trail is the very last part where you’re climbing up rocks and hills to get to the arch bridge. Once you get there though, it’s worth it. The views of Sedona are incredible, and you will be able to take badass photos on the arch bridge.
- Pro Tip: It’s possible to start at the Devil’s Bridge Trailhead, but you would need an off-roading vehicle to get there.
- (Another) Pro Tip: There are bathrooms on the left side of the road opposite the trailhead. As of June 2024, you do NOT need a Red Rocks Pass to park here.
6. Airport Loop Trail
- AllTrails Name: Sedona Airport Loop Trail
- Rating: Moderate
- Distance: 3.3 miles
- Time: 1 hour + 23 minutes
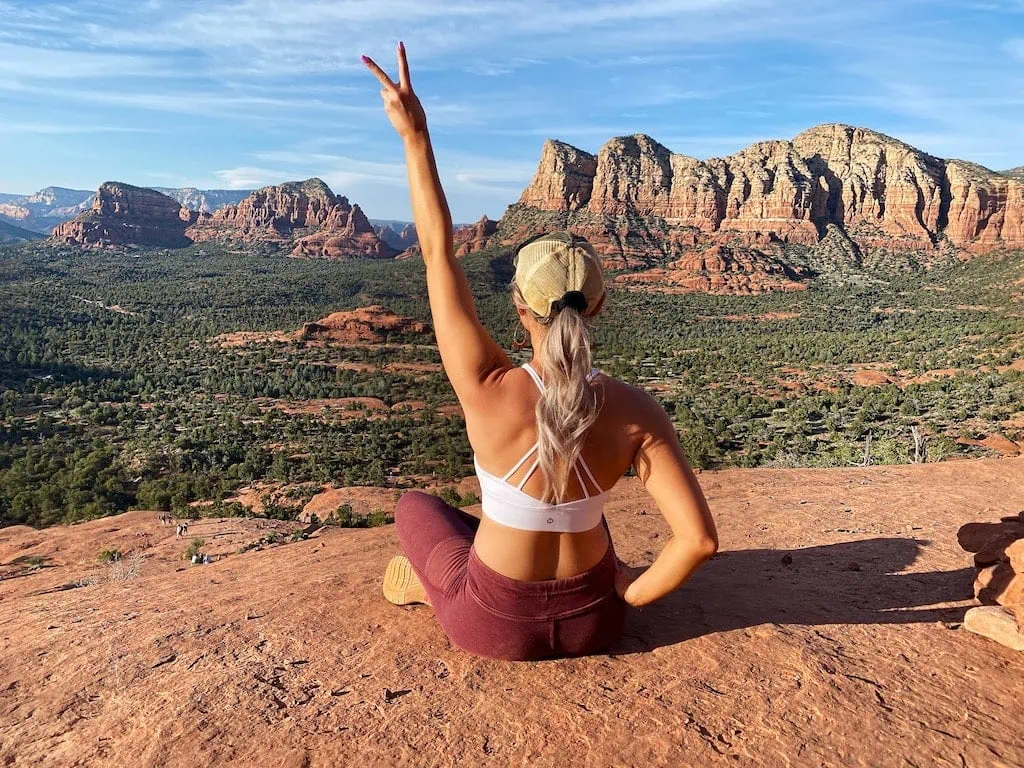
The Airport Loop Trail is exactly what it sounds like: a full circle loop that takes you around the airport. I absolutely love this trail because it gives you panoramic access to Sedona’s most beautiful and famous rock formations. You are able to see Cathedral Rock, Bell Rock, Courthouse Butte, Elephant Rock, Coffee Pot Rock, Snoopy Rock, and more, all from this trail.
If you start at the left of the parking lot and follow the signs, you’ll begin your hike by seeing more of the rock formations. Cathedral Rock, Bell Rock, Courthouse Butte, and Elephant Rock are all on this side. IMO, this is the most beautiful part of the trail, which is why I created Airport Loop Trail – Gina’s Version (see below).
Once you get to the top of the hill, your views transition into the valley and you see less of the red rocks. From this side, you can see Coffee Pot Rock and Snoopy Rock, but you will have a lot more trees in your way.
The hardest part about this trail is the number of rocks you have to climb over and maneuver around. There are a couple of hills, but IMO, none that are really strenuous. I also saw more critters on this trail than I did any of the others! There were a lot of lizards, ants, and even a couple quails!
Airport Loop Trail (Gina’s Version)
Distance: 2.8 miles
Rating: Moderate
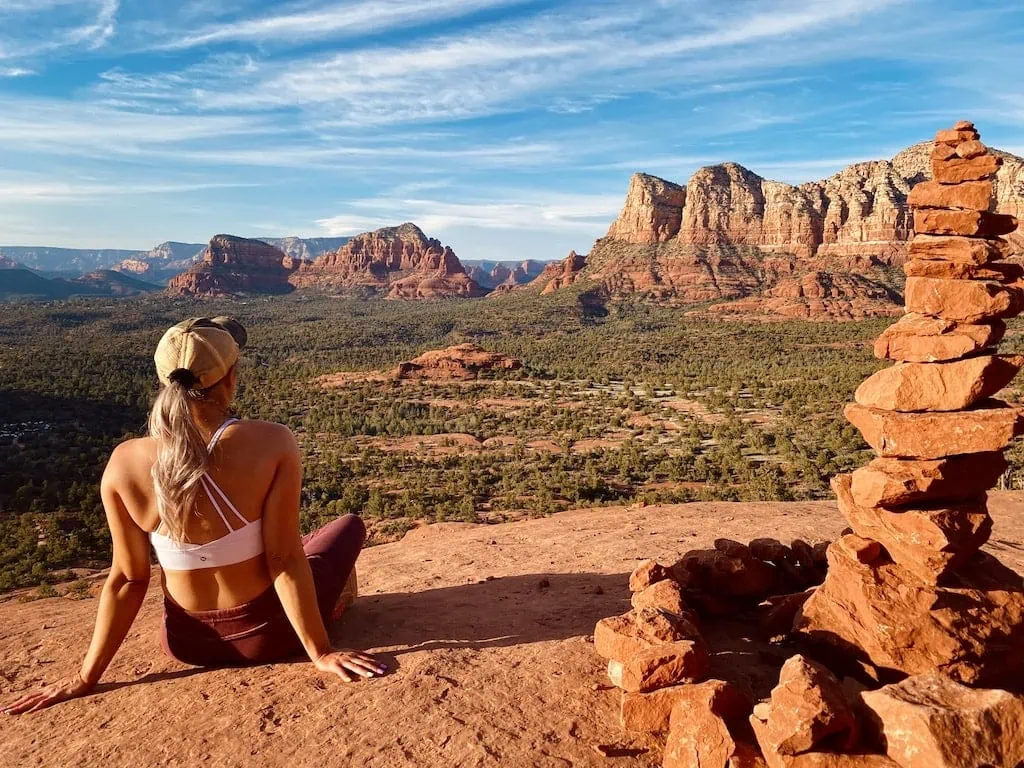
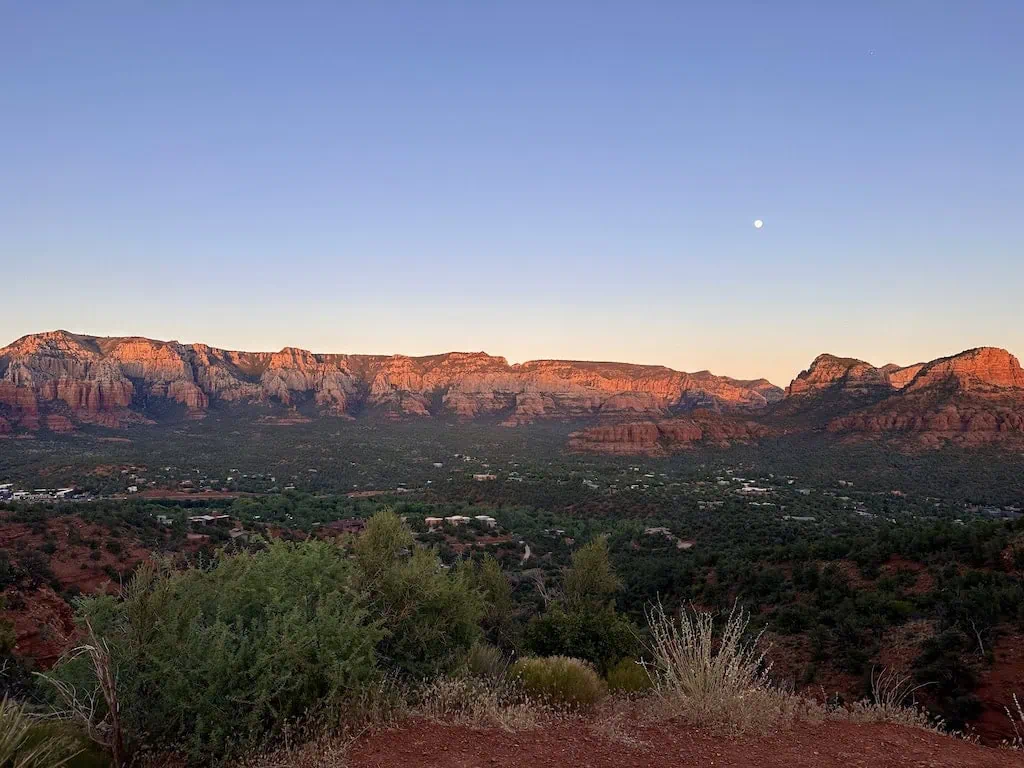
IMO, the best way to hike Airport Loop Trail is to do it right before sunset. I did this trail in the morning the first time, and while it was still incredibly beautiful, the mountains looked washed out from the position of the sun. I knew the airport was one of the top places to watch the sunset, so I thought why not try this hike during that time too?
To do this hike, you will follow the exact same route as the Airport Loop Trails in AllTrails, you just won’t go the entire way around the loop. See my specific instructions below:
How to Do Airport Loop Trail: Gina’s Version
- Arrive at the parking lot about an hour before sunset. For me hiking in June, this was 6:30-6:45pm, but double check with your weather app.
- Start at the left of the parking lot and follow the Airport Loop signs to the right.
- Hike this trail for roughly 1.4 miles. This will take you to the top of the hill. You will get phenomenal views of the rocks, and they will look extra red from the position of the sun.
- Now, turn around and come back the way you came. You will now be facing the direction of the sunset. Once you get back to the beginning of the trail, you can quickly make your way up to the giant rock (which will now be on your right) to watch the sun go down and the stars come out.
- You’re welcome 😘
7. Long Canyon Trail –> The Birthing Cave
- AllTrails Name: Birthing Cave Trail
- Rating: Moderate
- Distance: 1.9 miles
- Time: At present time, AllTrails does not list a time, but it took me roughly an hour (including time for pictures).
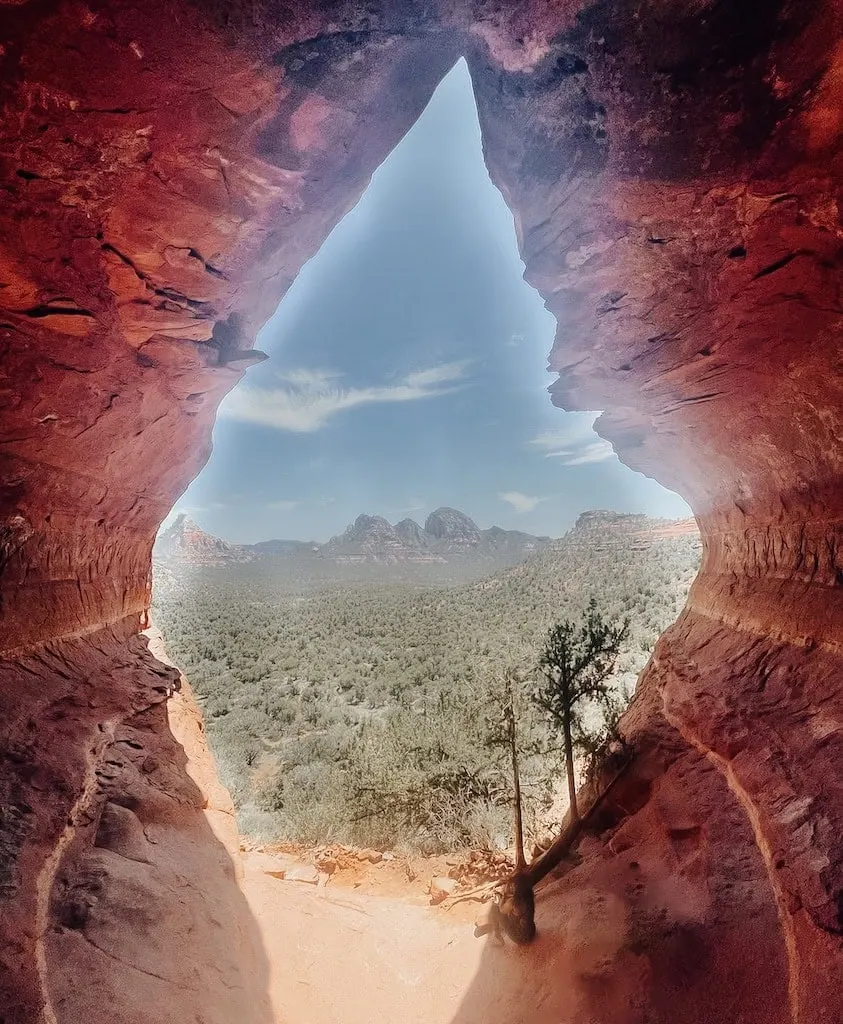
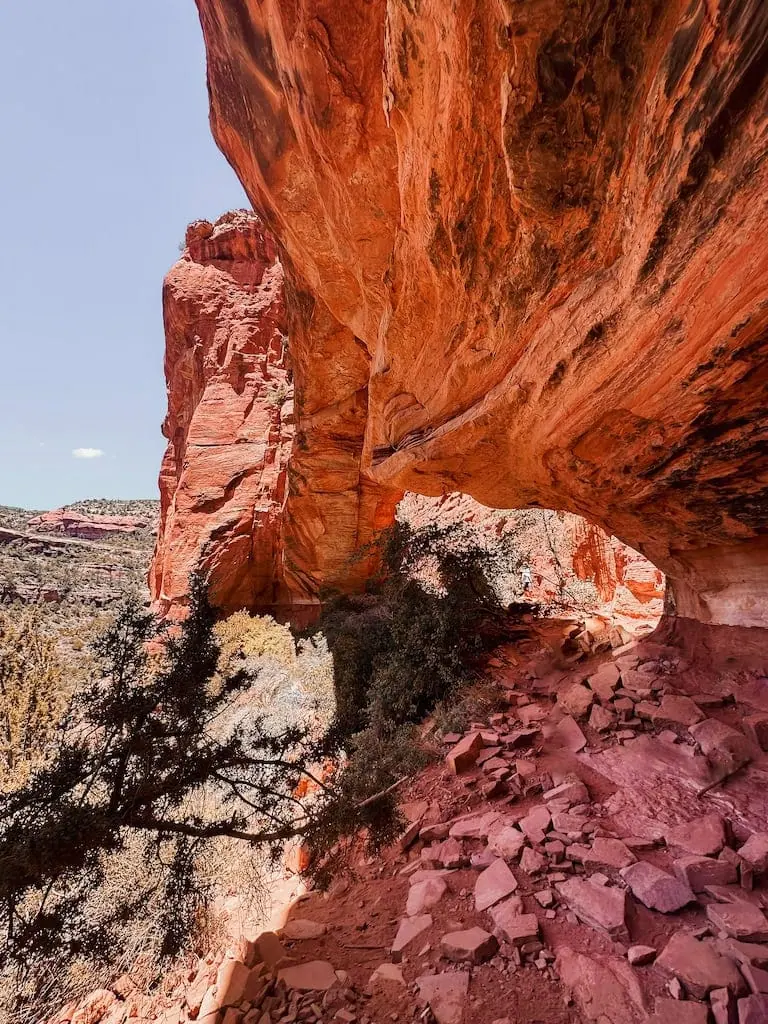
Legend has it, the Birthing Cave got its name because it’s where ancient Native American women who lived in this area went to give birth. Considering you have to climb up a rocky hill in order to get in there, I’m skeptical. That seems like way too much effort for me, especially if I was pregnant. The more likely reason the cave got its name is because, well….
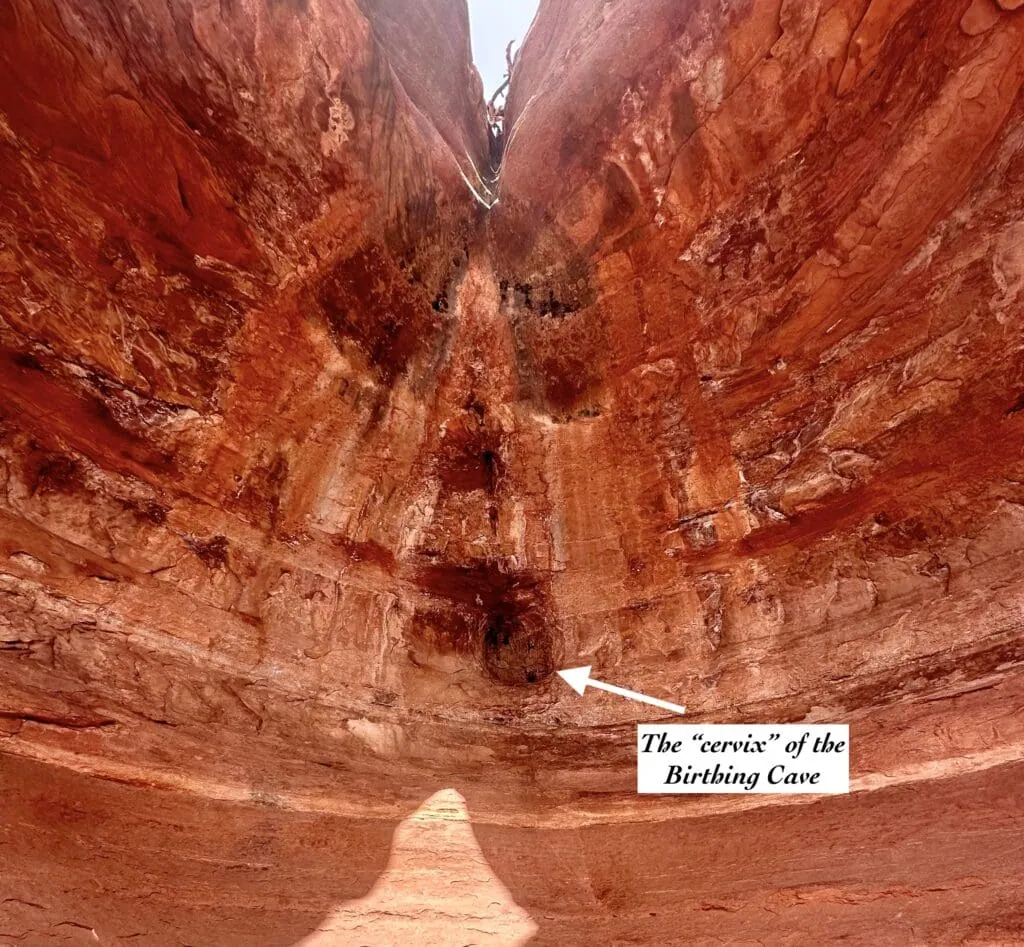
As if this isn’t suggestive enough, there is a spot towards the back of the cave in the center that looks like a hollowed out hole. People have referred to this spot as the “cervix” of the birthing cave. It’s pretty wild how naturally, anatomically correct this cave is!
The best way to begin your trek to the Birthing Cave is to start at Long Canyon Trailhead – however, there is only roadside parking near here (and that’s if you’re lucky!). Worst case, you can park at Mescal Trailhead and walk to Long Canyon, which will be a little over half a mile.
I thought the views along this trail were “meh” until I got to the cave. There are a lot of trees, and no great views of the red rocks. The upside is this is an easy hike; I did it mid-day in June and it didn’t feel too strenuous to me. There’s not much shade though, so bring plenty of water!
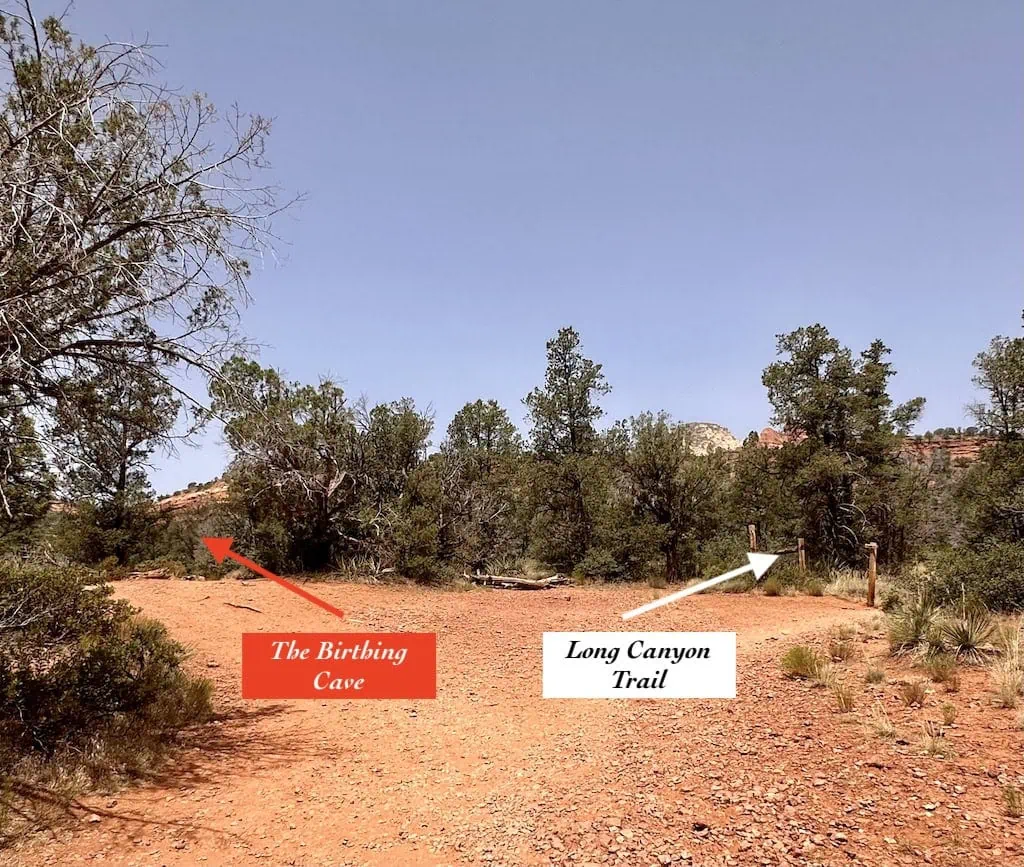
- Pro Tip: You will eventually come to a wide space in the trail where the trail sign points to the right; however, you want to go left to get to the Birthing Cave. The AllTrails map is correct, just make sure to watch for this turn.
- (Another) Pro Tip: If you want great photos inside the cave, go with a friend. The smooth, sloped rock is not tripod-friendly!
8. Fay Canyon Arch Trail
- AllTrails Name: Fay Canyon Arch Trail
- Rating: Moderate
- Distance: 1.5 miles
- Time: 41 minutes
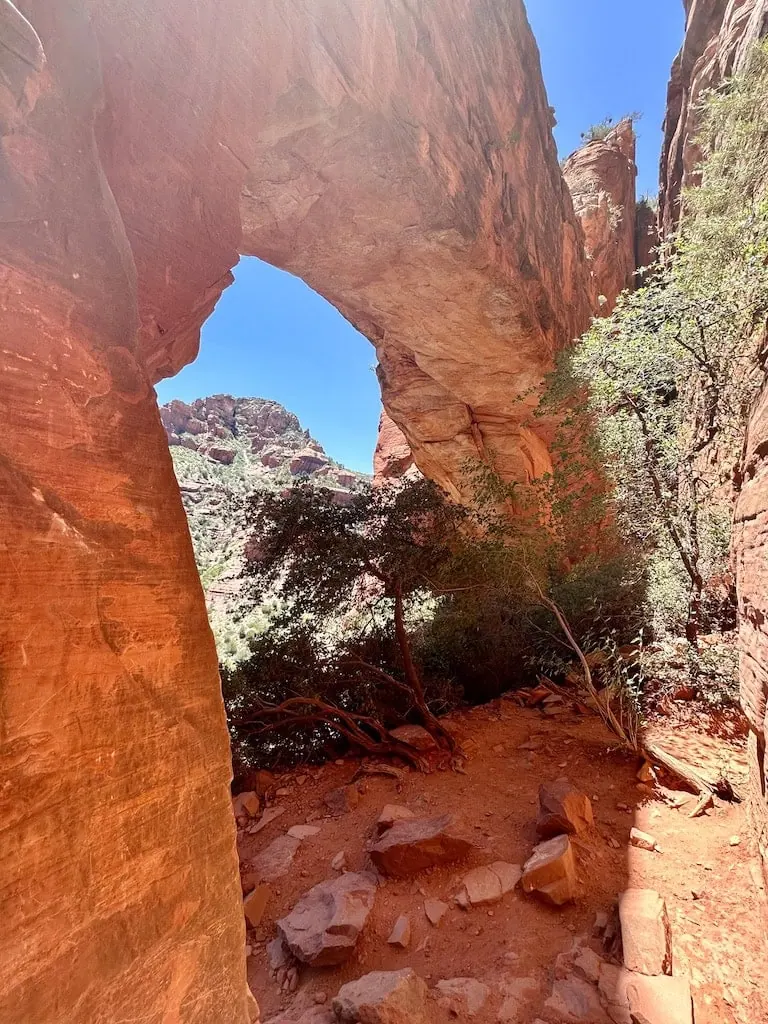
Fay Canyon Trail has an arch off the beaten path of the main trail that is similar to Devil’s Bridge. TBH, I thought the Devil’s Bridge arch was more impressive. You can’t stand on top of this arch like you can the one on Devil’s Bridge; you can only see it from the ground. It’s cool though, and a good hike if you want something quick. Out of all the hikes on this list, this one was probably my least favorite.
The only strenuous part of this hike is where you get up close to the Fay Canyon Arch. I can’t even lie…this climb was hard. There are a lot of rocks and hills, plus cacti and other plants that you’re better off avoiding. Otherwise, if you don’t go up near the arch, it’s a pretty good, leisurely stroll.
The Fay Canyon Trailhead is located on Boynton Pass Rd, so you get the benefit of the gorgeous Boynton Canyon drive. As of 2024, the parking lot does not require a Red Rocks Pass…plus, it’s a pretty decent size!
- Pro Tip: AllTrails has 2 different trails for Fay Canyon; make sure you pick the one that says “Arch Trail“
9. Amitabha Stupa Loop in Peace Park
- AllTrails Name: Amitabha Stupa Loop
- Rating: Easy
- Distance: 0.3 miles
- Time: 7 minutes
“A hike that’s only 0.3 miles?” Listen…I know. When I heard there was a hike devoted to Buddha in Sedona that was only 0.3 miles, my first reaction was to give the People’s Eyebrow (Google this if you didn’t grow up watching WWE in the 90’s). I didn’t think I heard correctly. But once I drove to the trailhead and walked for a few minutes, I was amazed by what I found…
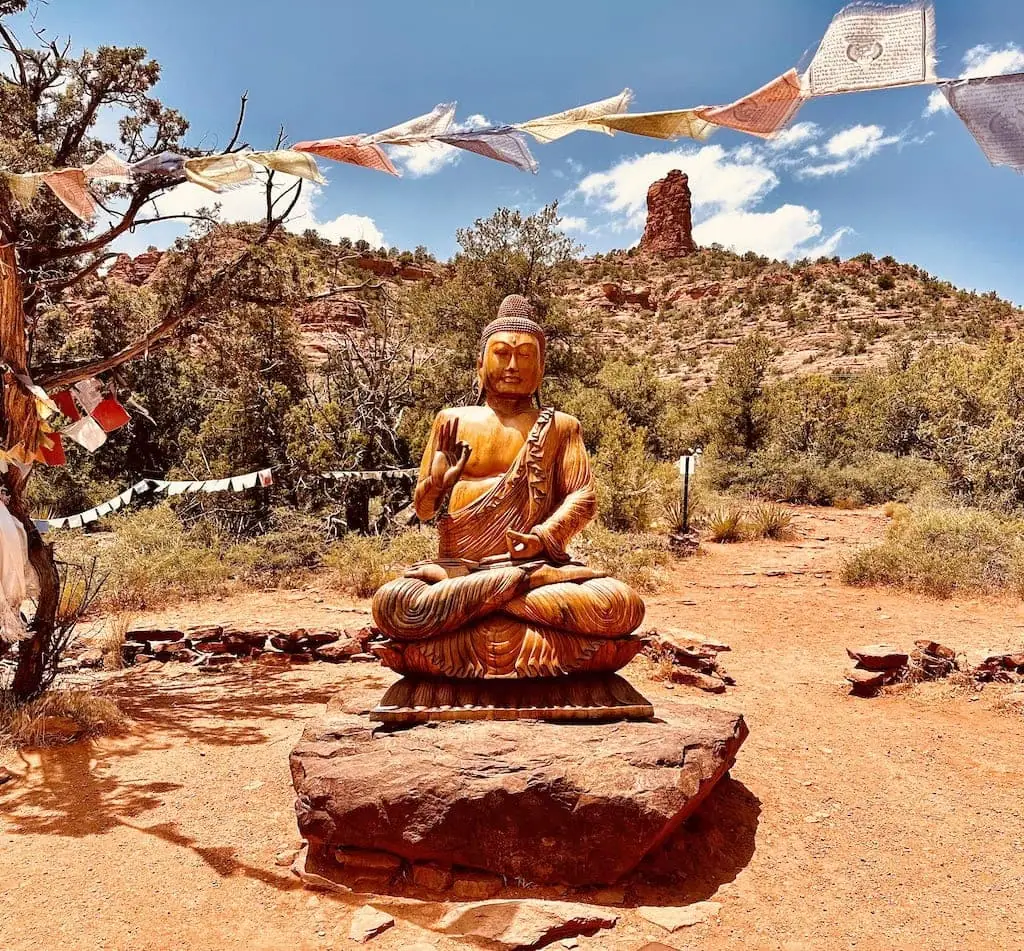
But let’s back up a moment. What even is a Stupa?! The Stupa Loop Trail is located in Peace Park and is an area of prayer, meditation, and peace. A “Stupa” is considered to be the embodiment of Buddha’s wisdom and compassion, and a powerful agent of spiritual transformation. The best way to use the Stupa is to walk in a clockwise direction, at least 3 times, while reciting a mantra or saying prayers for loved ones (or even just the world in general). There are multiple areas that give instructions throughout this trail that help you learn and understand the Stupa and Buddhist culture.
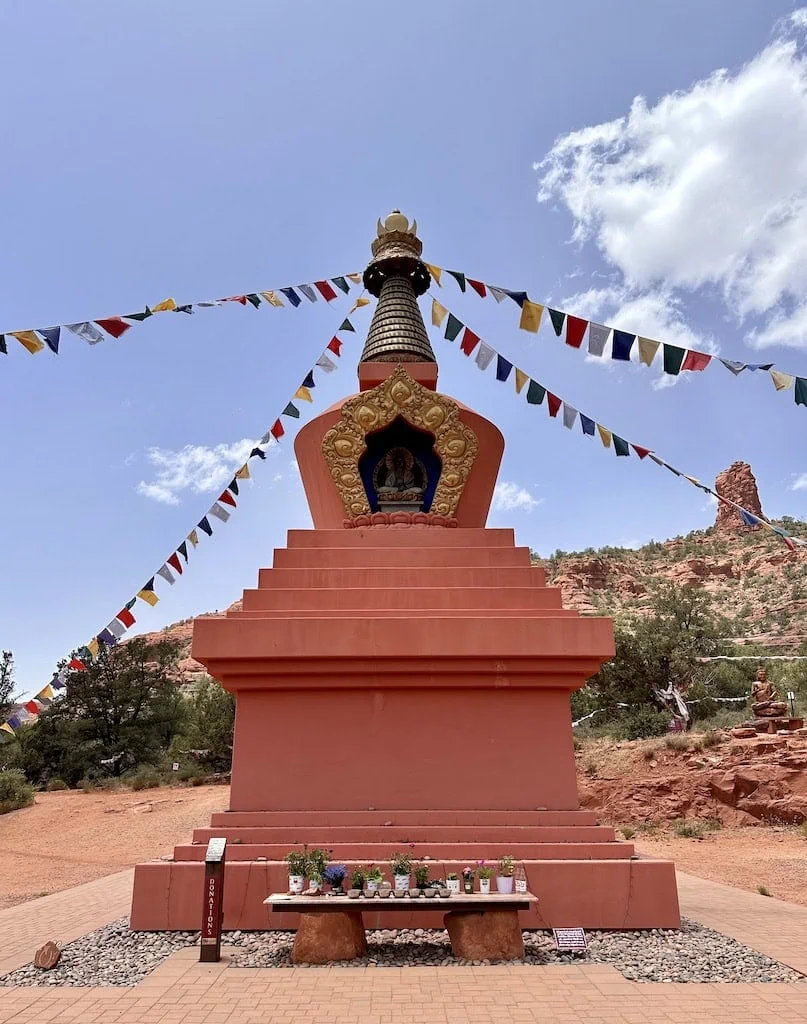
I included this “hike” for multiple reasons – the main one being that is just so randomly cool that something like this even exists in Sedona. You can come here and learn about different cultures, walk around the stupa, check out the Buddha statue, and just take a moment of peace for yourself. This is also a good place to come if you’re worn out from hiking but aren’t ready to call it a day just yet. I love that this area is so unique but also in line with all the good vibes, wellness, and spiritualness that Sedona is known for.
Choosing Your Trail by Category
Trails with Hidden Caves
Trails with the Best “Mountaintop” Views
- Cathedral Rock
- Bell Rock
- Devil’s Bridge (once you get to the arch)
- Long Canyon Trail -> The Birthing Cave (once you get to the cave)
- Airport Loop Trail
Trails with Vortex Sites
- Boynton Canyon Trail
- Cathedral Rock
- Bell Rock
- Airport Loop Trail (use Airport View Trail on AllTrails to go directly to the vortex site)
My Favorite Trails From This List
- Boynton Canyon Trail
- Soldier’s Pass Trail
- Cathedral Rock
- Airport Loop Trail (Gina’s Version)
Explore Sedona Hotels
Sedona Tours and Activities
Shop My Hiking Essentials!


This post made me so excited to explore Sedona! The stunning views and diverse trails sound amazing. I can’t wait to try out the recommendations you shared, especially the Cathedral Rock hike. Thanks for the tips, Gina!
Yay!! So happy you found this helpful! I hope you have the best trip 🙂 -Gina
This is easily one of the best lists I’ve come across. You absolutely rocked this! Thanks for sharing.
Ahhh! Thank you so much, I’m so happy you loved it! 🙂 -Gina